The Overgrown Ruins Chapel is situated in the northeastern part of the Ravaged Beach. It’s a useful location to visit because inside you’ll meet Withers, who will allow you to respec characters and revive dead companions. For details on Withers and his services, please refer to our Respec Guide.
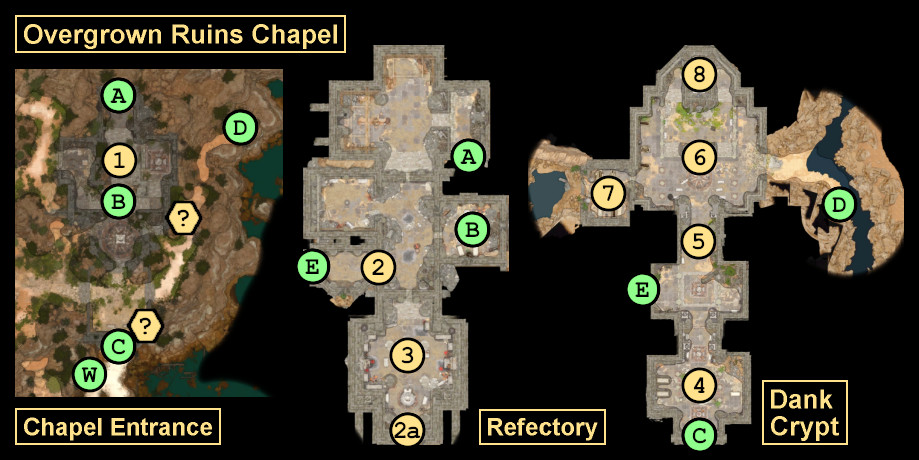
Map
Points of Interest 1 – Scavengers (Outside) 2 – Locked Door / Lever 3 – Scavengers (Inside) 4 – Trapped Crypt 5 – Heavy Oak Doors 6 – Grotto 7 – Side Room 8 – Withers’ Tomb ? – Dirt Mounds
Exits A – Main Door B – Cracked Stone C – Ancient Door D – Hatch E – Interior Door
Scattered around the outside of the chapel, you’ll encounter four scavengers. If you approach any of them, then you’ll end up talking to their leader Gimblebock. If you can pass a DC-10 Intimidation or Persuasion check, or a DC-12 Deception check, then the scavengers will leave peacefully. Otherwise, you’ll have to fight them.
The easiest way to attack the scavengers is to approach them from the west. You’ll find Warryn standing on a crate overlooking the chapel courtyard. If you sneak up on him, then you should be able to shove him down to the courtyard, damaging him and giving you a height advantage against him. This will also give you a chance to attack him while the other three looters move towards you.
You’ll earn 50 xp for talking your way past the scavengers, but 70 xp for killing them. You’ll find some basic equipment on the scavenger corpses, including Thieves’ Tools and a Trap Disarm Toolkit on Taman’s corpse. You’ll also find some Thieves’ Tools in a backpack in the scavengers’ camp in the chapel courtyard.
You’ll discover a door here (#2) without a handle or lock. To open it, you’ll have to beat a DC-1 Perception check and detect a lever to the south (#2a). When you pull the lever, the door will open.
Along with the scavengers outside the chapel (#1), you might also have to deal with a few inside the chapel. There are three ways to approach them (or not):
If you enter the chapel via the ancient door (Exit C) or hatch (Exit D), then you’ll start out in the Dank Crypt, and you won’t have to face the scavengers at all.
If you enter via the cracked stone (Exit B), then you’ll cause a commotion when you arrive, and you’ll have to fight all of the scavengers at once.
If you enter via the main door (Exit A), and if you avoid alerting Andorn, then you’ll surprise him when you arrive, which should allow you to kill him easily. Then slightly farther into the chapel, you’ll encounter Mari patrolling the interior. If you sneak up on her before attacking, then you’ll surprise her as well, and you should be able to kill her before she can dash south to warn her companions. This will allow you to split up the battle against the scavengers into three smaller fights rather than one big one, making this the recommended option.
If you attack the scavengers, then you’ll earn 90 xp total for defeating them. You’ll find Thieves’ Tools and a Trap Disarm Toolkit on Mari’s corpse and a Bandit’s Key on Andorn’s corpse. Otherwise, the scavengers will just have basic equipment. The Bandit’s Key can unlock the main door (Exit A) if you used some other entrance into the chapel.
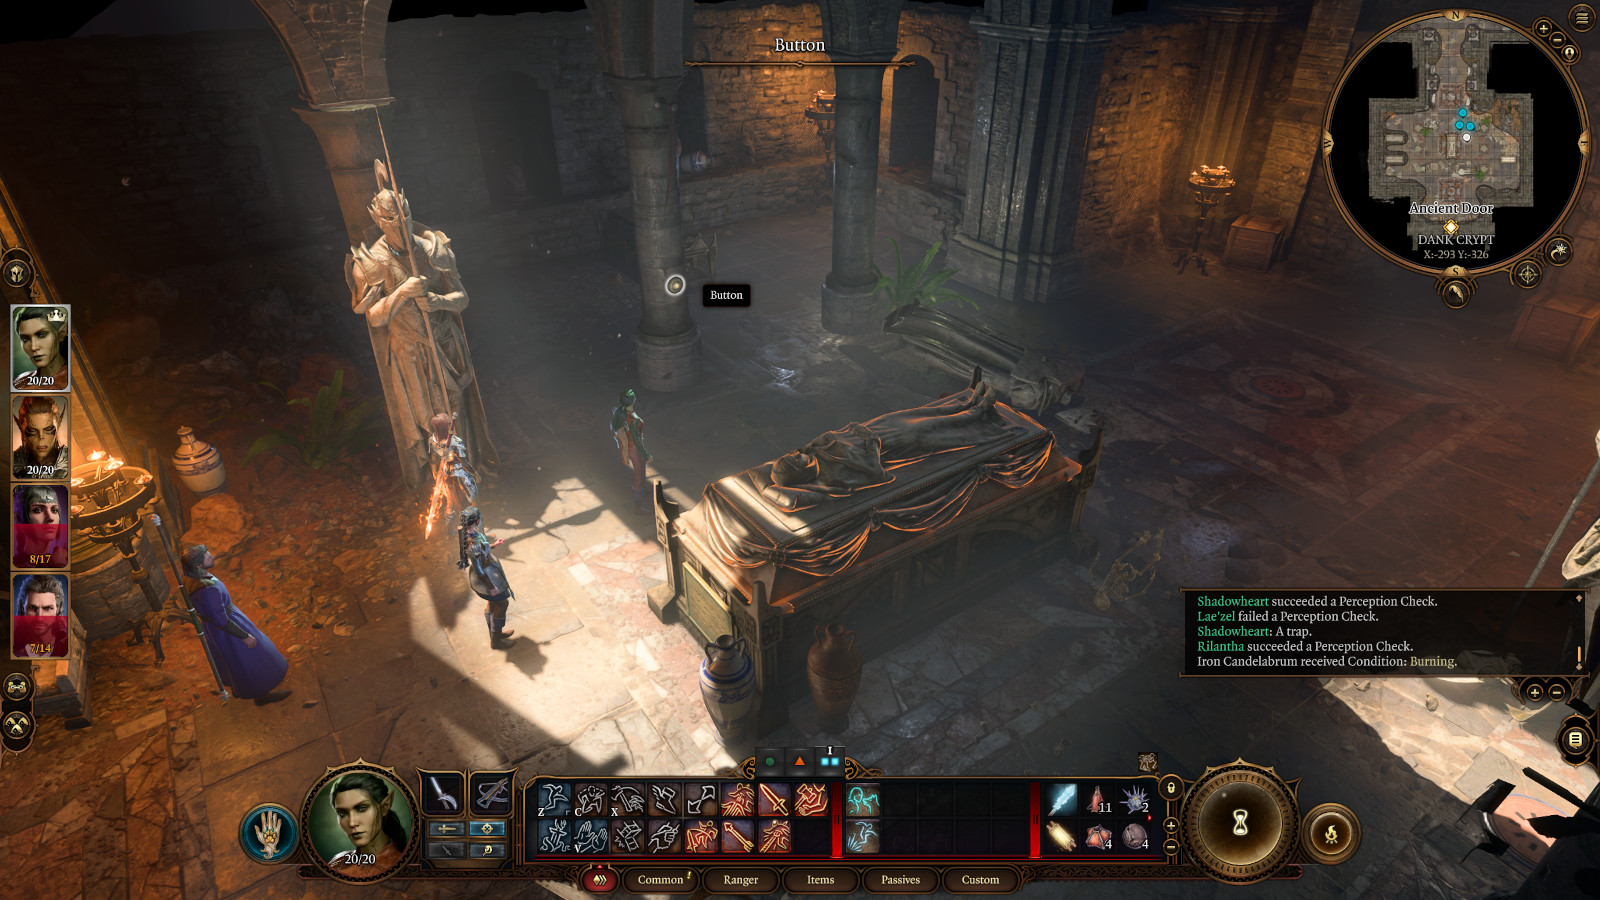
This large crypt is heavily trapped with several floor vents and fireball-shooting gargoyle heads just waiting to do you in. The floor vents require DC-15 Perception checks to detect, while the gargoyle heads only require DC-10 Perception checks. Both require DC-10 Sleight of Hand checks to disarm. Luckily, Trap Disarm Toolkits (unlike Thieves’ Tools) aren’t consumed with each use. You’ll only lose them if you fail to disarm a trap, so you can knock yourself out and disarm all of the traps if you want.
The sarcophagus in the center of the crypt is also trapped. You’ll need to pass a DC-15 Perception check to detect the trap, and you’ll need to pass a DC-10 Sleight of Hand check to disarm it. Inside the sarcophagus, you’ll find the unique spear The Watcher’s Guide plus an Engraved Key, which you can use to unlock the heavy doors to the north (#5). Inside the other sarcophagi in the room, you’ll find some basic equipment, plus a Soul Coin, which might prove useful if you recruit Karlach as a companion later in the game.
Note: You might notice a button on the middle, eastern column in the crypt. Pressing it will turn off all of the traps in the chamber, just in case you accidentally triggered them. If you’re quick, this means you can loot the central sarcophagus without disarming it, and then immediately press the button to avoid taking any damage.
To open these doors, you’ll either need to pick the lock, which requires passing a DC-10 Sleight of Hand check, or you’ll need to collect the Engraved Key from the trapped crypt to the south (#4).
Inside this chamber, you’ll find some corpses scattered around — four entombed scribes and one entombed warrior. They won’t have much in their inventory, but you should loot them anyway. They’re going to rise up and turn into enemies soon (see #8), and they’ll be much easier to defeat if they don’t have any weapons. On one of the scribes, you’ll find a Heavy Key, which you can use to unlock the ancient door to the south (Exit C).
Note: In the center of the chamber, you might notice a large statue. The first time you approach it, if you beat a DC-15 Religion check, then you’ll recognize it as representing Jergal, Scribe of the Dead.
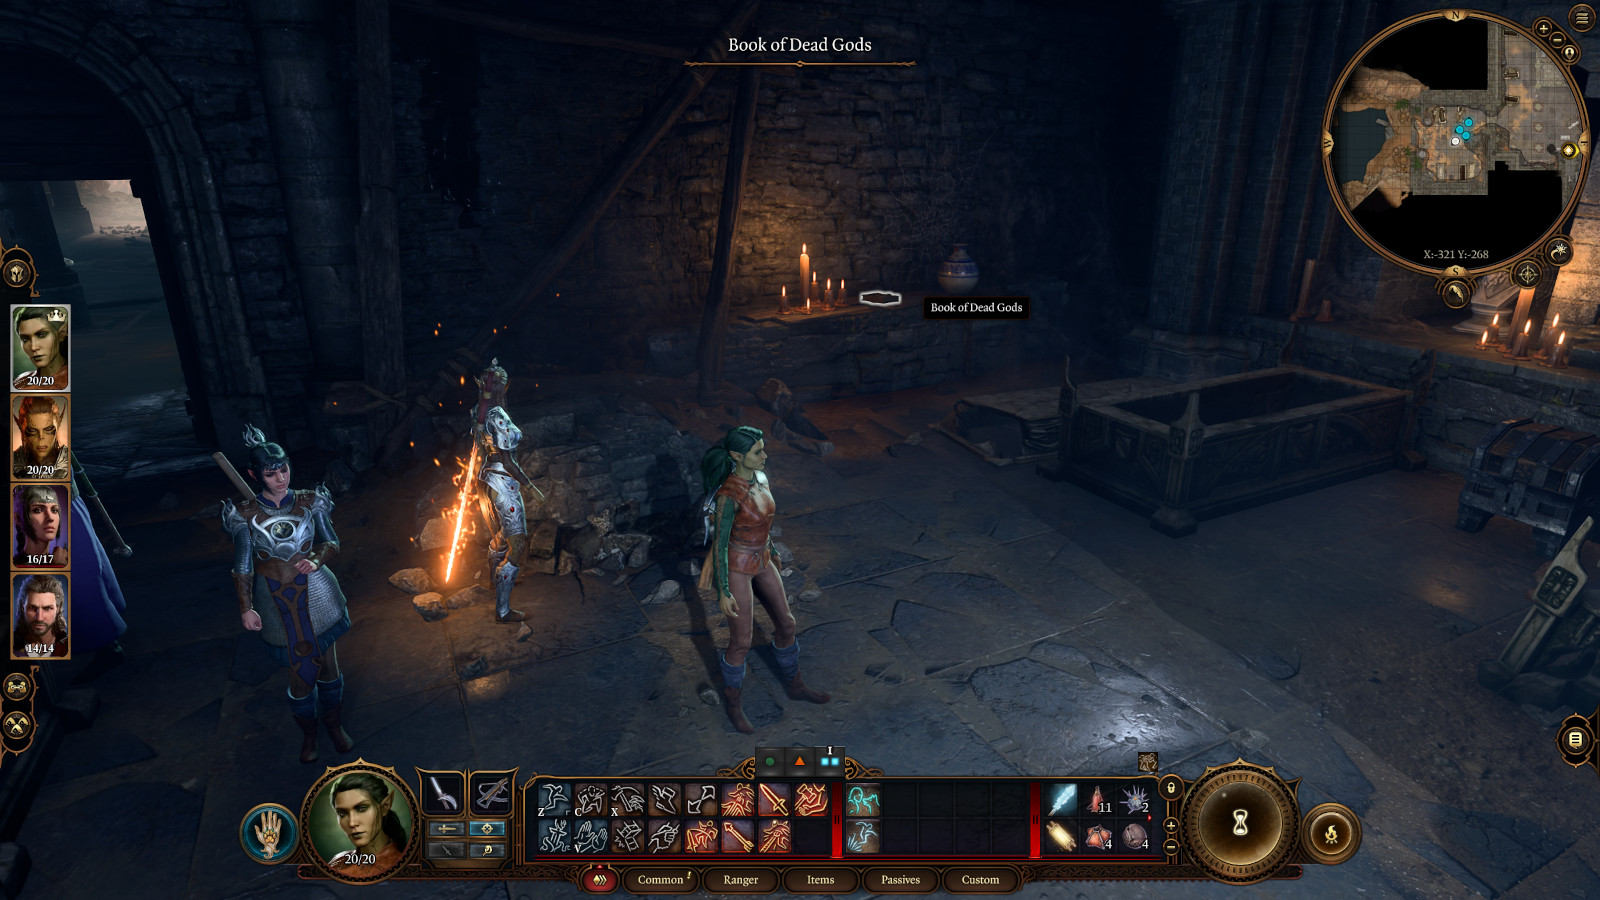
Inside this room, you’ll find the Book of Dead Gods. It’ll be visible right away, but when you get close enough to it, you’ll automatically “detect” it and cause it to glow, making it easier to spot.
The Book of Dead Gods will start out locked, but if you pass a DC-15 Arcana or Strength check, then you’ll destroy the lock, and you’ll find a Scroll of Ray of Enfeeblement inside. After opening the book, if you pass DC-10 checks for Religion and Investigation, then you’ll decipher that the book contains a list of dead gods.
As long as you’re able to open the book, any companion in your party with with the Sage background (like Gale) with gain the Secrets of the Sundering inspiration. If you’re actually able to read the book, then any companion in your party with the Acolyte background (like Shadowheart) will gain the Dvinity Undone inspiration.
Also in the room in a sarcophagus, you’ll find another Soul Coin.
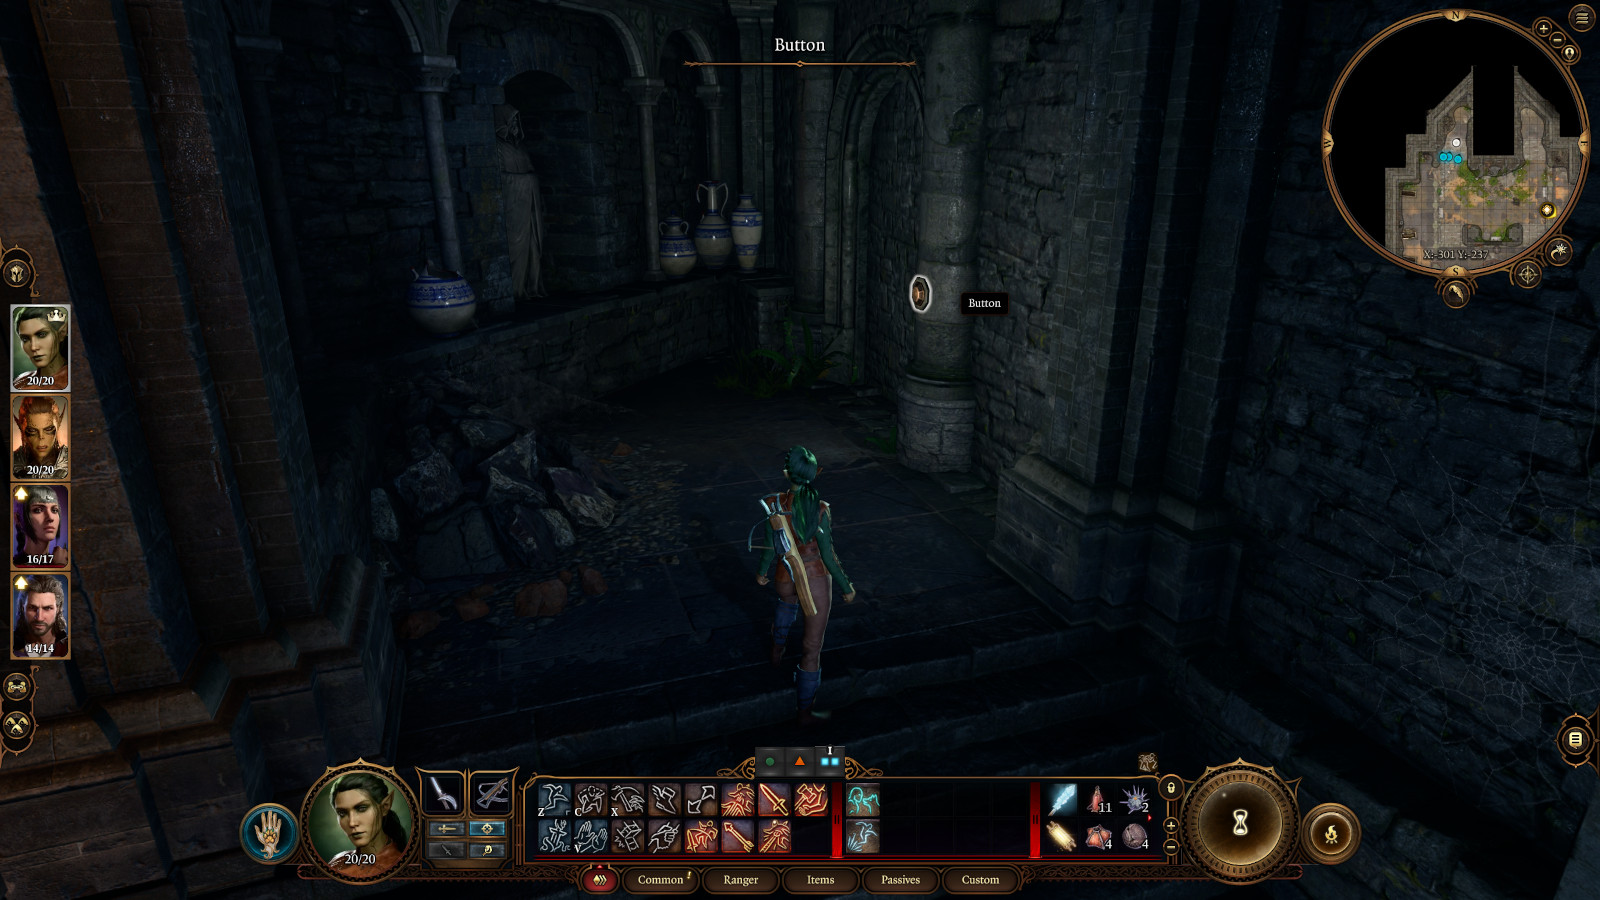
This tomb will start out closed. To open it, you’ll need to press the button on its western side. This button will start out visible, but when you approach it, if you beat a DC-7 Perception check, then you’ll “detect” it and cause it to glow, which will make it extra noticeable.
However, when you press the button, the five entombed corpses in the grotto (#6) will rise up and attack you. This battle shouldn’t be too bad, especially if you looted the corpses beforehand. But if you have trouble, consider retreating into Withers’ tomb and forcing the corpses to come to you.
Inside the tomb, you’ll discover a richly adorned sarcophagus. When you open it, you’ll meet an undead creature named Withers, who will ask you, “What is the worth of a single mortal’s life?” No matter what you say to Withers — even if you try to attack him — he’ll appear at your camp the next time you go there, where he’ll be able to revive fallen companions, respec characters, and summon hirelings — for a modest price in gold.
Before leaving the tomb, don’t forget to loot Withers’ sarcophagus, where you’ll find a third Soul Coin, and also the heavy chest nearby, where you’ll find The Amulet of Lost Voices.
There are dirt mounds at these two locations, but you’ll have to pass Survival checks to detect them. With a Shovel in your inventory, you’ll be able to dig up the dirt mounds, which will reveal treasure chests containing random loot.
This door will start out locked, but when you interact with it, Andorn on the other side will mistake you for Gimblebock and ask you if everything is okay. If you pass a DC-10 Deception or Performance check, then he’ll buy your response and unlock the door for you. Otherwise, he’ll keep it locked, and you’ll have to pass a DC-7 Sleight of Hand check to pick it open.
When you enter the chapel, if you didn’t alert Andorn first, then you’ll surprise him when you arrive, which should make it easy for you to defeat him in battle. If you kill Andorn quickly, then he won’t be able to warn the other scavengers (#2) that they’re in danger.
But if you fail in your attempt to trick Andorn, or if you don’t try to trick him at all at all, then Andorn will set a Blast Mine by the door (which you’ll automatically trigger when you enter the chapel), and you’ll have to fight all of the scavengers together.
Note: Andorn will drop a Bandit’s Key when he dies. If you kill him before opening the door here, then the key will allow you to unlock it without the use of Sleight of Hand.
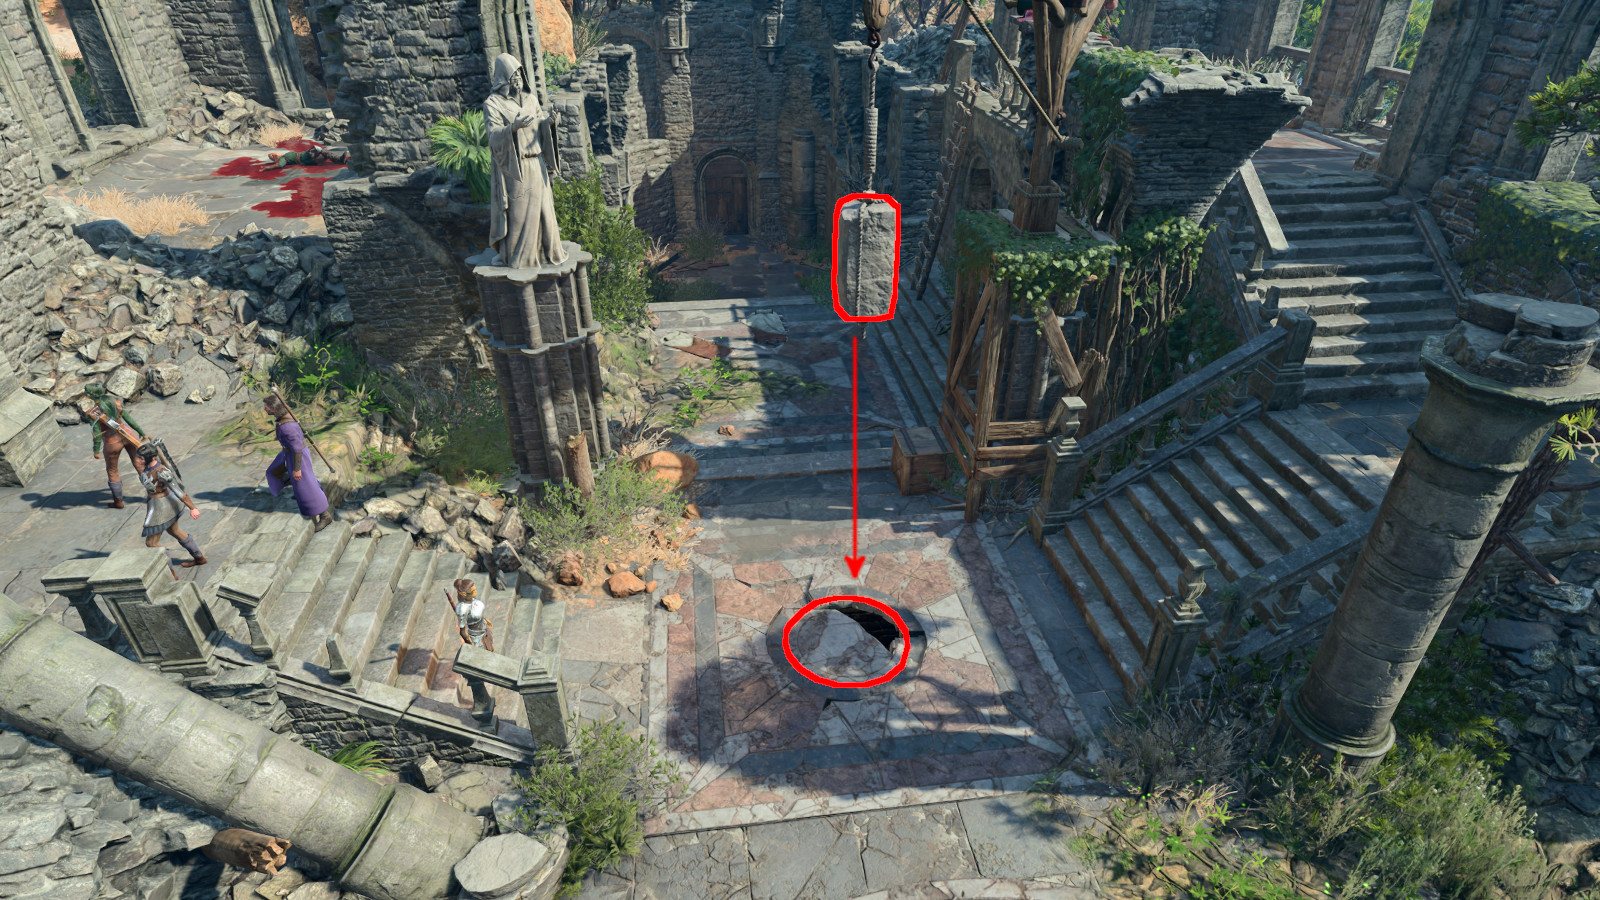
You can use the cracked stone here as a one-way entrance into the chapel’s Refectory. To “open” the stone, you’ll need to damage the foundation block hanging over it. This will cause the block to fall down through the stone.
If you use this entrance, don’t jump down. That will likely cause you to fall prone and take damage. Instead, just click on the ground below, and your characters will climb down. But be careful! If there are still scavengers inside the chapel (#3), then they’ll immediately attack you.
To open this door, you’ll either need to loot its Heavy Key from one of the corpses in the grotto (#6), or you’ll need to pick its lock by passing a DC-20 Sleight of Hand check.
The locked hatch here will allow you to descend to the chapel’s Dank Crypt, but you’ll have to beat a DC-20 Sleight of Hand check to pick open the lock. If you’re in the Dank Crypt already, then you won’t need to pass any ability checks to use the hatch as an exit. You just might need to pull a nearby lever to lower the hatch’s ladder so you can climb up to it.
Starting with cassette tape games on the TRS-80, Steven has been playing, creating, and writing about games for a long, long time. This makes him experienced, not old. Lately, Steven has been focusing on walkthroughs, making sure everybody knows how to solve Towers of Hanoi puzzles.