The Mountaintops of Giants is the final required open world area of the game, and isn’t nearly as dense as the previous parts of the Lands Between. Still, it’s far from empty, and within these snowy mountains, you’ll find both familiar foes and unique castles and dungeons. One might also imagine that part of the reason there’s less stuff up here is that few Tarnished ever make it this far — but you did!
The Mountaintops of the Giants are reached by traversing the Forbidden Lands — these are accessible from Leyndell, Royal Capital. However, you’ll also need to go up the Grand Lift of Rold at the end of the Forbidden Lands, which you won’t be able to activate without the Rold Medallion.
To receive the medallion, you must first defeat Morgott, the final boss of the royal capital. First, attempt to enter the Erdtree, then once you discover the thorns blocking your path (you need to actually try and receive the message about the way being blocked) go to the Elden Throne site of grace in the middle of Morgott’s boss arena and rest — there, you’ll be able to speak with Melina, and she’ll give you the Rold Medallion.
Walkthrough
This guide is broken up into sections — start with Western Mountaintops, and then use the tabs to navigate to the next section when you’re ready.
Upon finishing your ride on the Grand Lift of Rold, you’ll find yourself in the Mountaintops of the Giants. You’ll be facing north — continue this direction and then northeast as the path bends to the right, and you’ll soon come across a monument with the Map: Mountaintops of the Giants, West at its base. Equipped with a map of the area, you can continue northeast, where the path will open up into a snowy area. On the left by the edge of the cliff is the Zamor Ruins site of grace, and (if you’ve been following his quest) nearby is what appears to be Yura — speak to him and discover the truth of how this dead man is walking.
There are a number of copy/pasted Heros of Zamor in the nearby ruins (that we’ll soon enter), but none of them drop anything useful, so it’s best to avoid them unless you want to test your skills on them — summons are available if you choose to fight these foes.
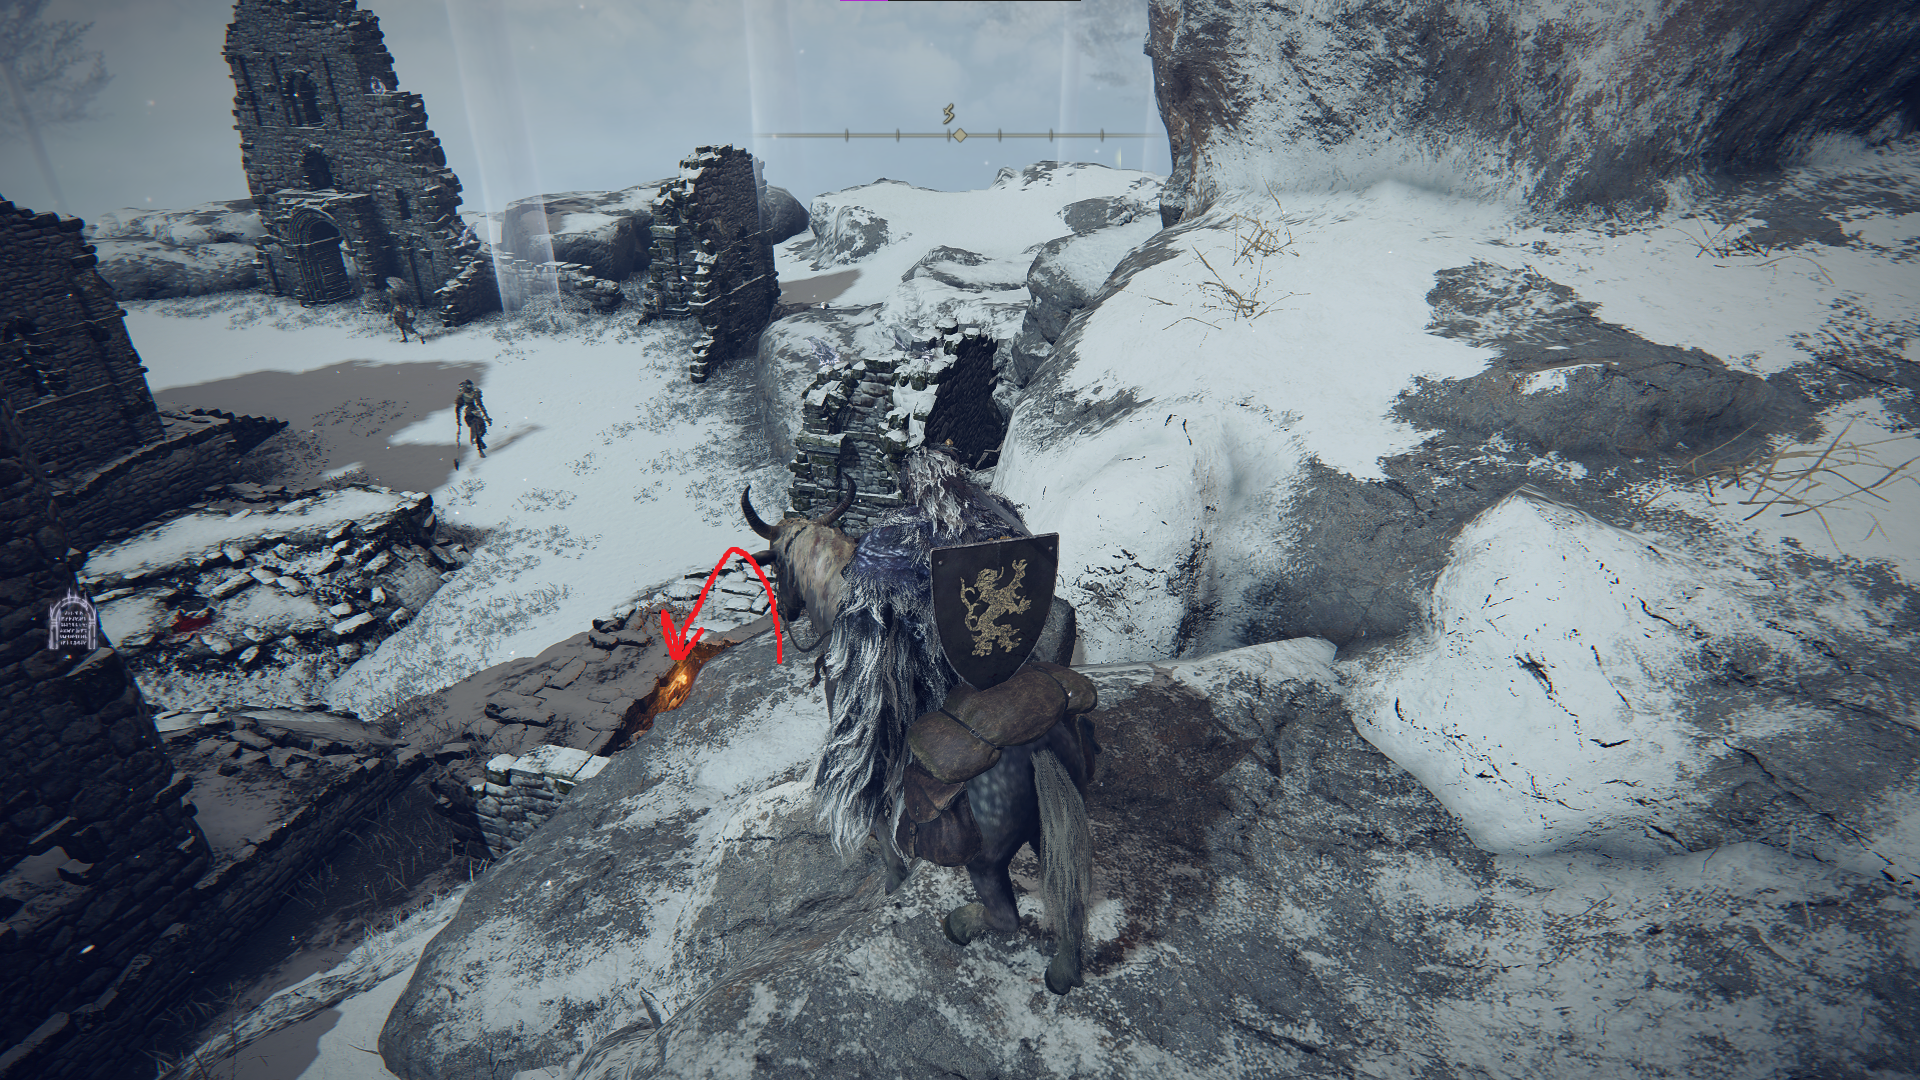
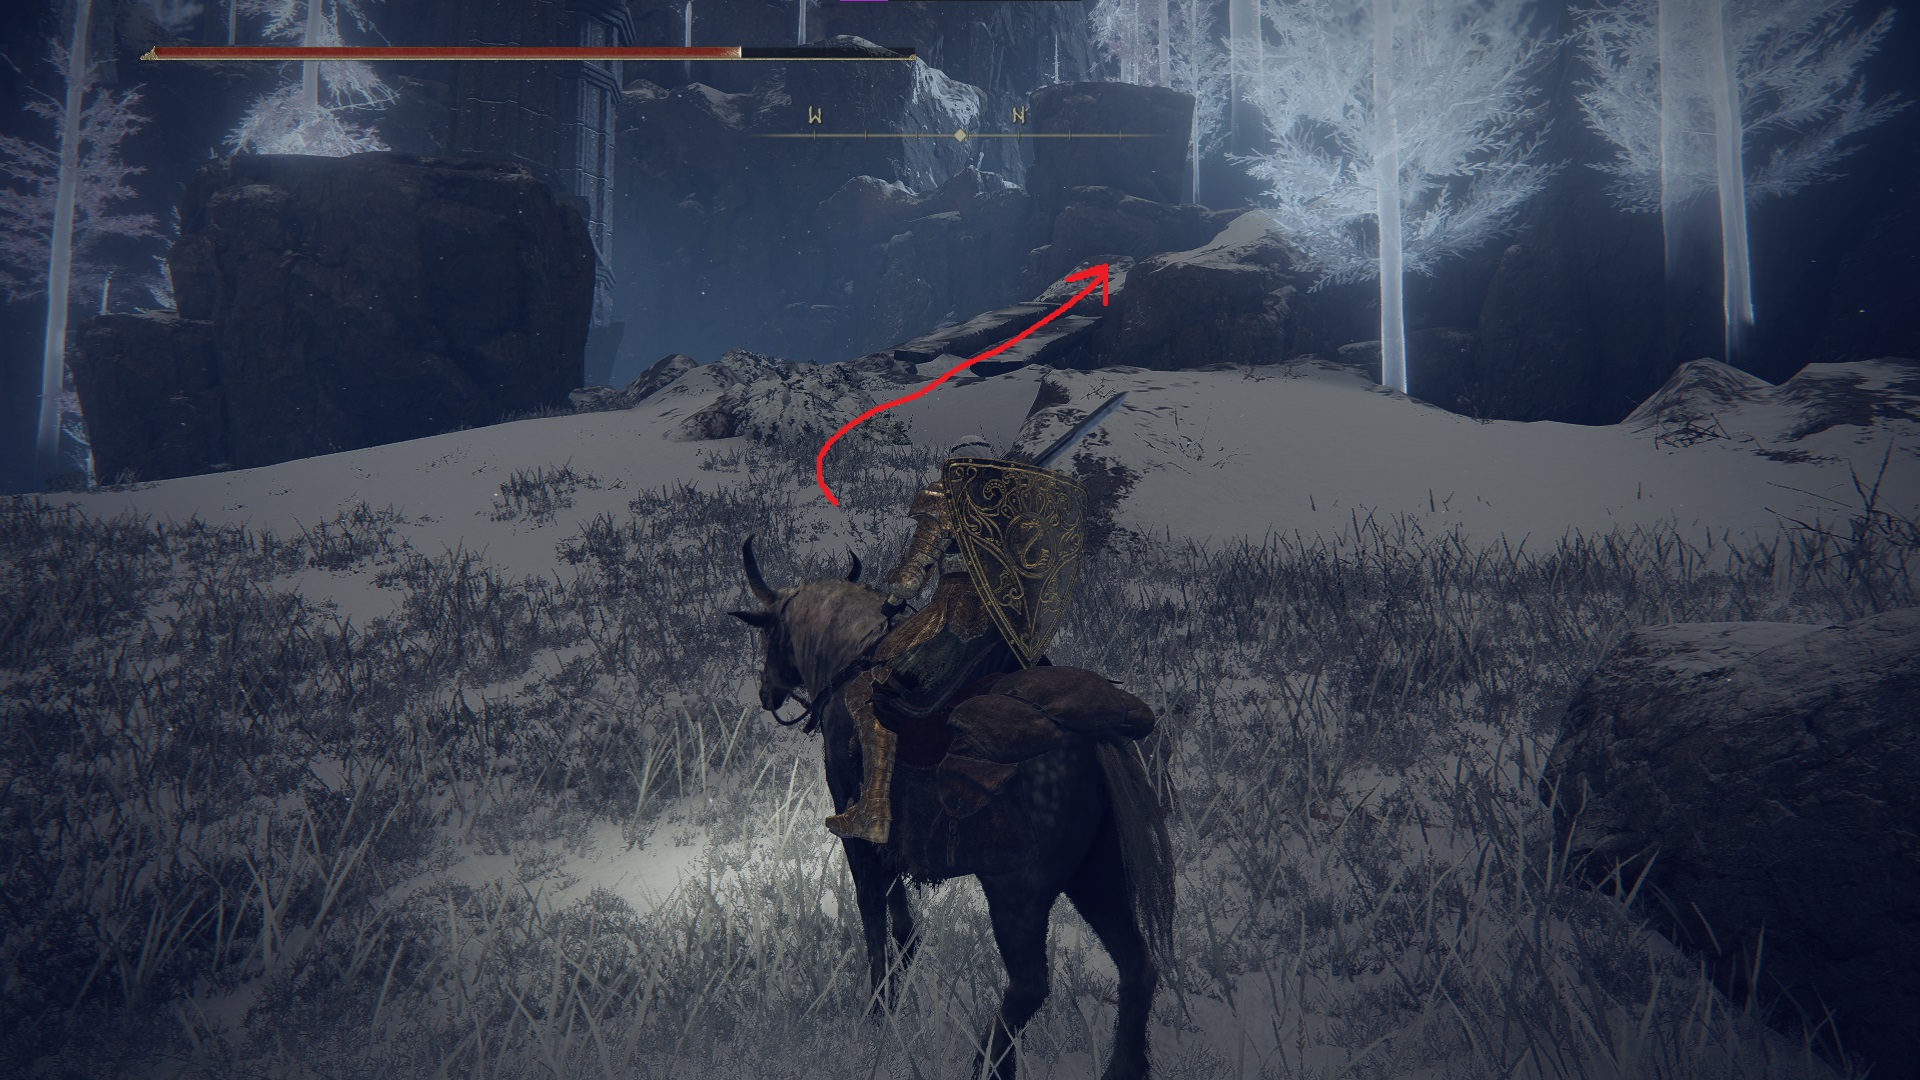
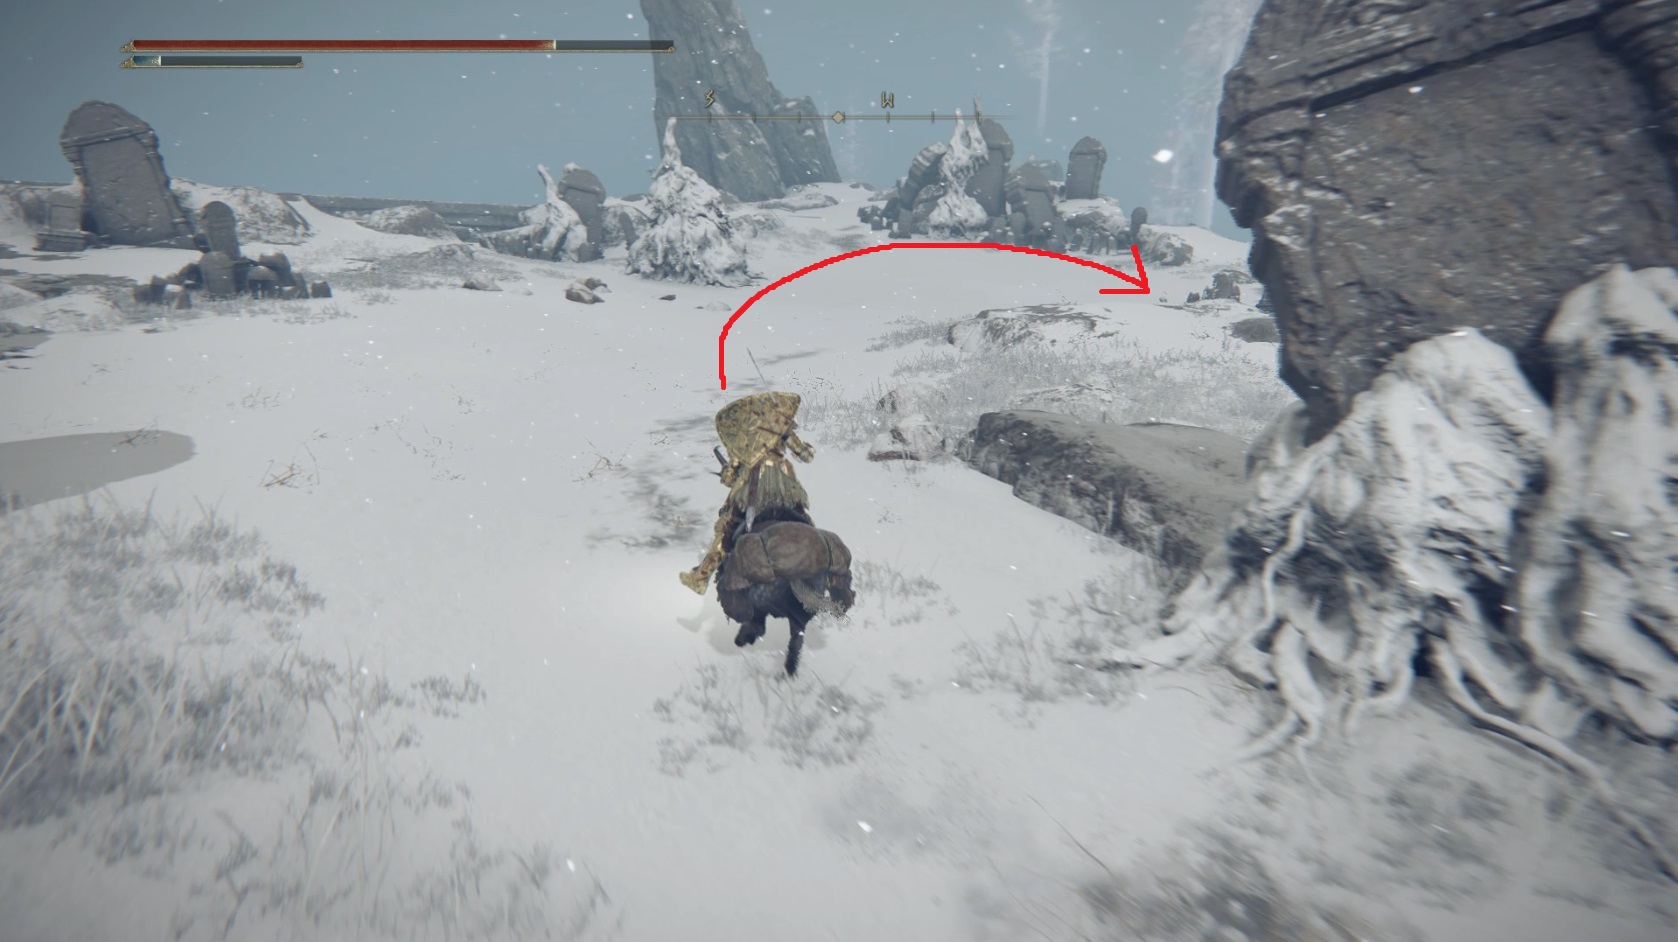
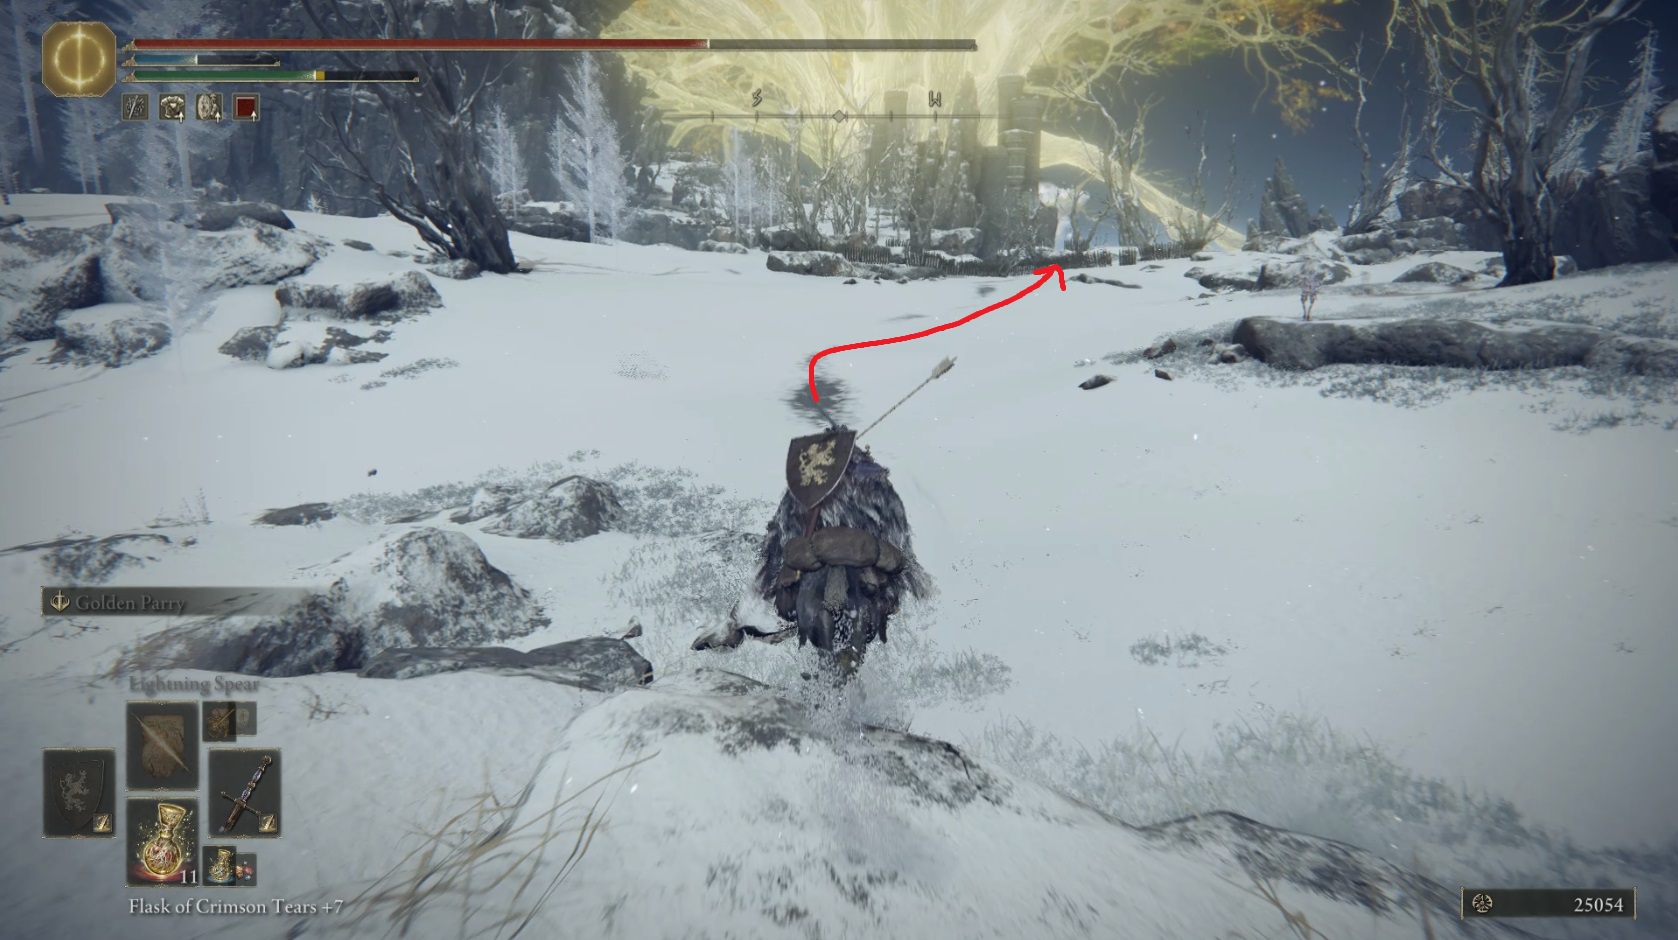
From “Yura”, look south, where you’ll see some snowy high ground. Use torrent to make your way up via the ruined foundation and the rocks:
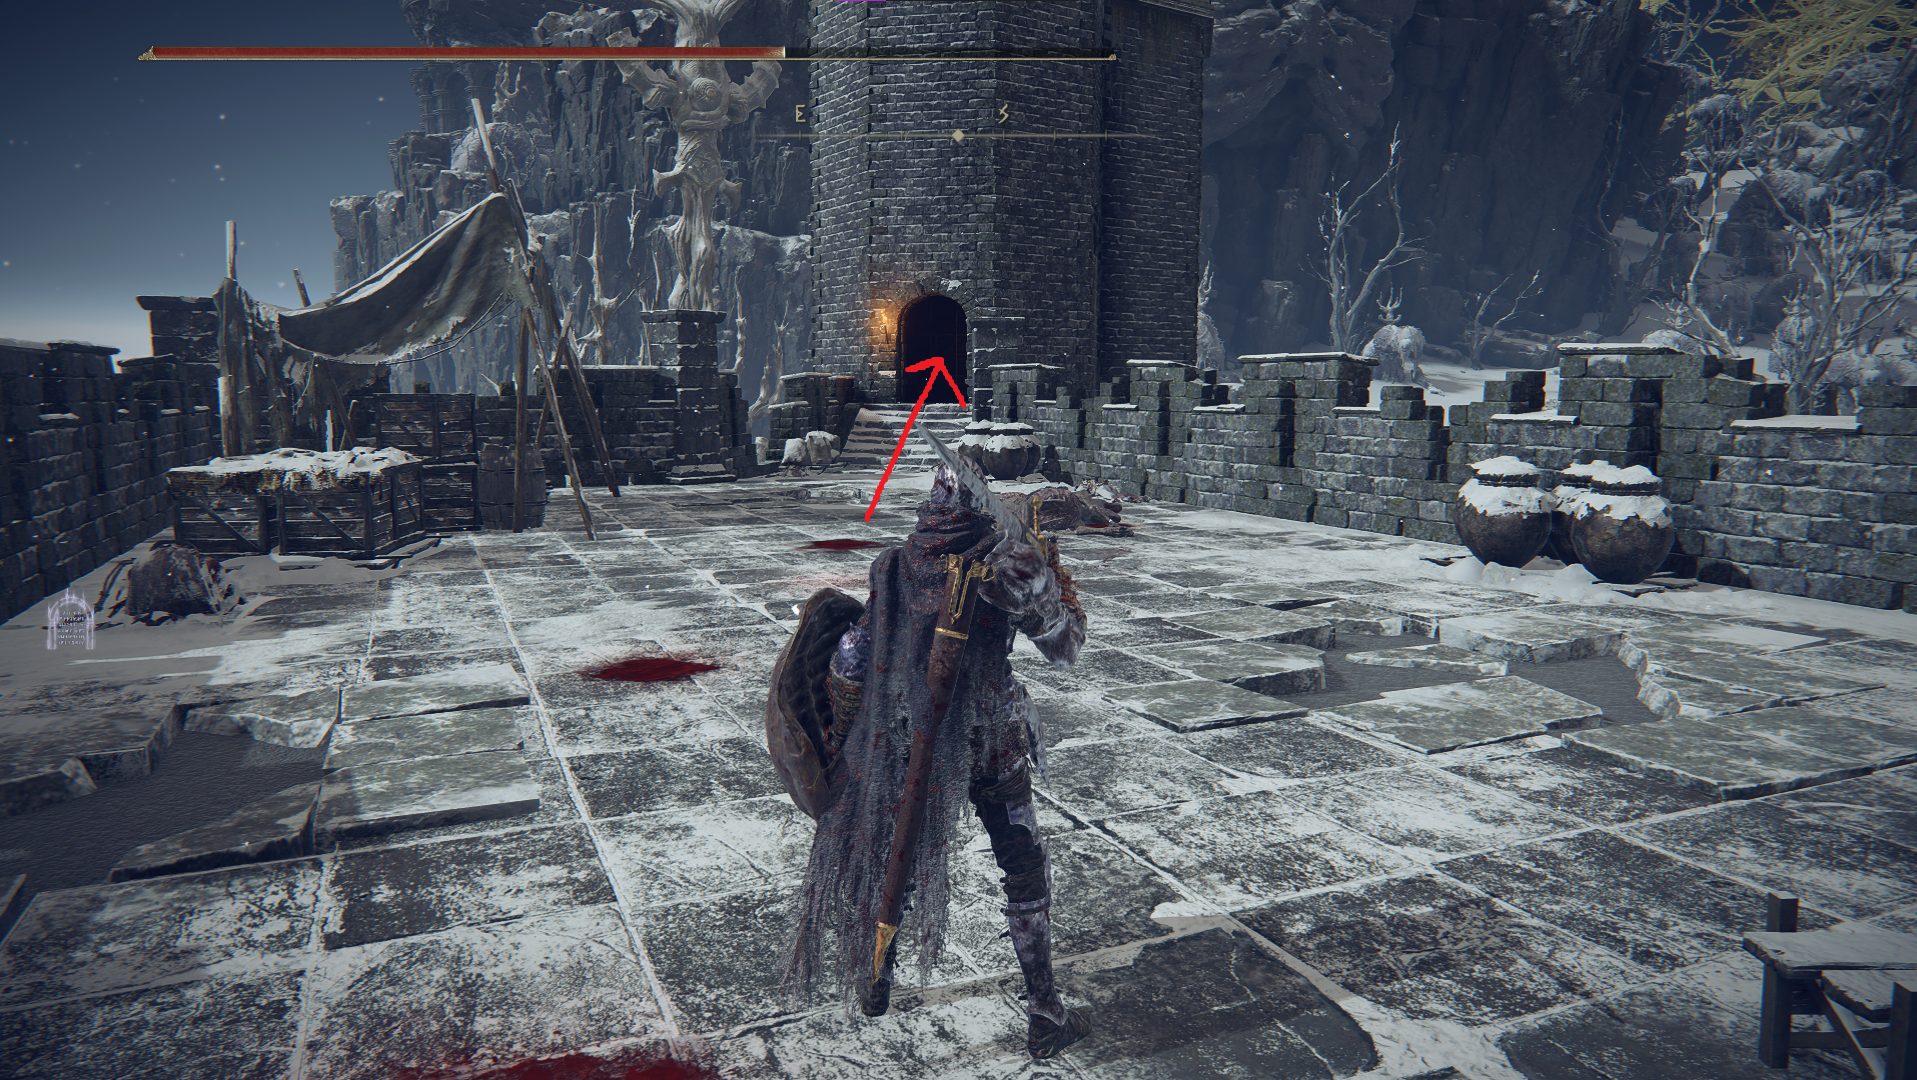
Once you’re up on the snowy high ground, you’ll see a bird to the south feasting on a corpse. As you approach, a second bird may swoop down on you from the right — kill this one before engaging the one on the corpse, then grab the x2 Sliver of Meat for yourself. Head west to the edge of the high ground and look over the edge to find a torch-lit stairway that leads below the ruins. Down the stairs and through the door is a chest that contains the Smithing-Stone Miner’s Bell Bearing [3] — you can be sneaky and avoid the patrolling warriors, or you can just go fast and ignore them.
Head on down!
After snagging the bell bearing, head east from the entrance to the basement and into the ruined building — on your right as you enter through the broken wall is a corpse with the Zamor Ice Storm sorcery. Head due northeast from the building you’re in and make your way to the edge of the ruins, where the final building here has a corpse with some Invigorating Cured Meat. Grab it and continue following the path as it heads east — the very first “tree” on your left is actually a kind of totem with a loot beetle at the top. Use a projectile to knock it down, then pop it for a Somber Smithing Stone [7].
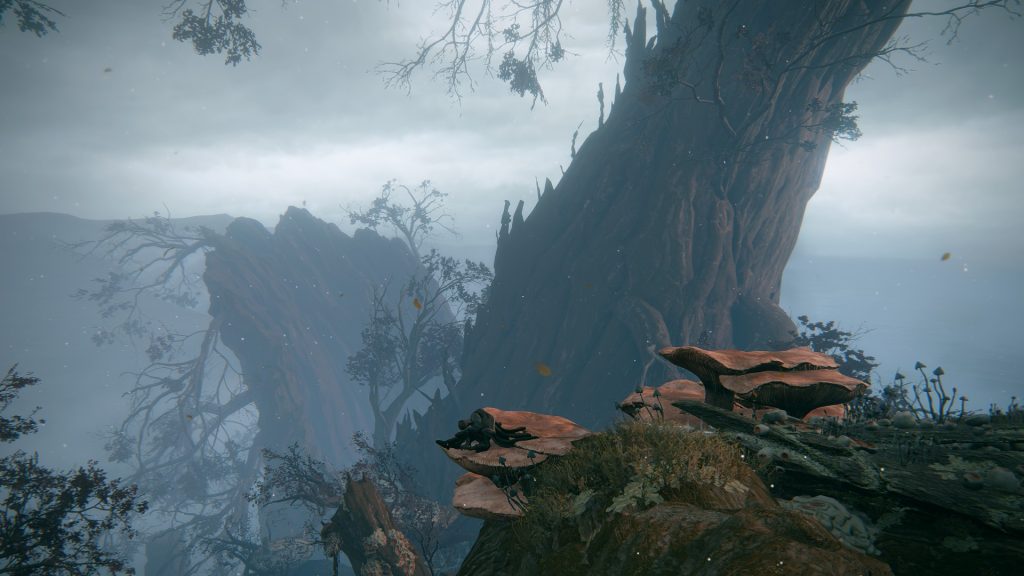
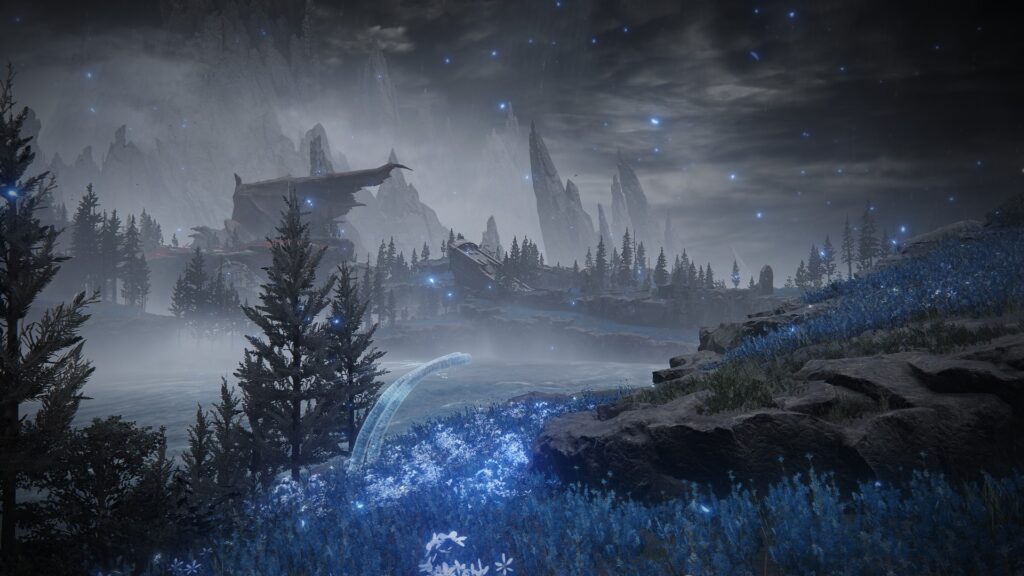
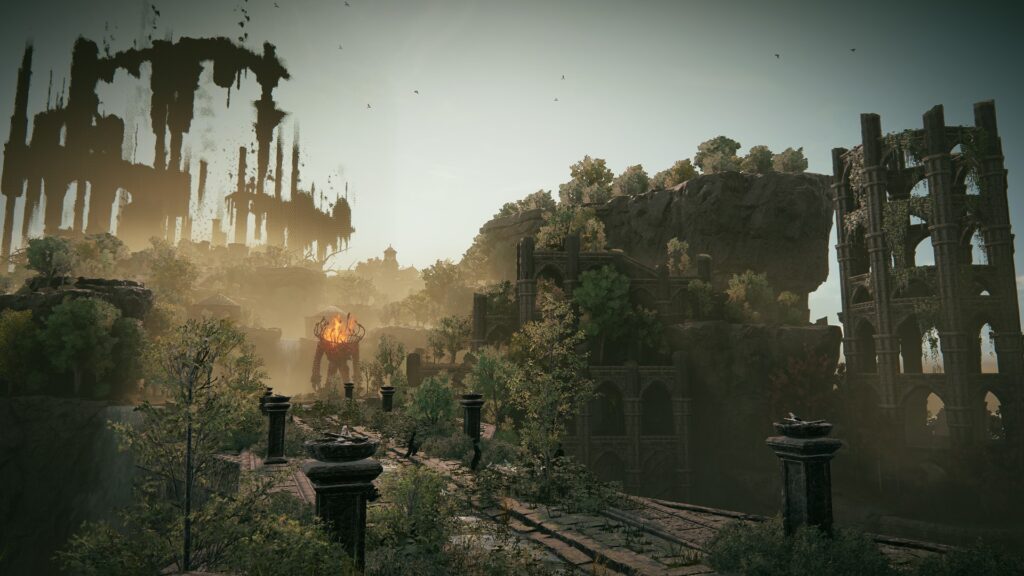
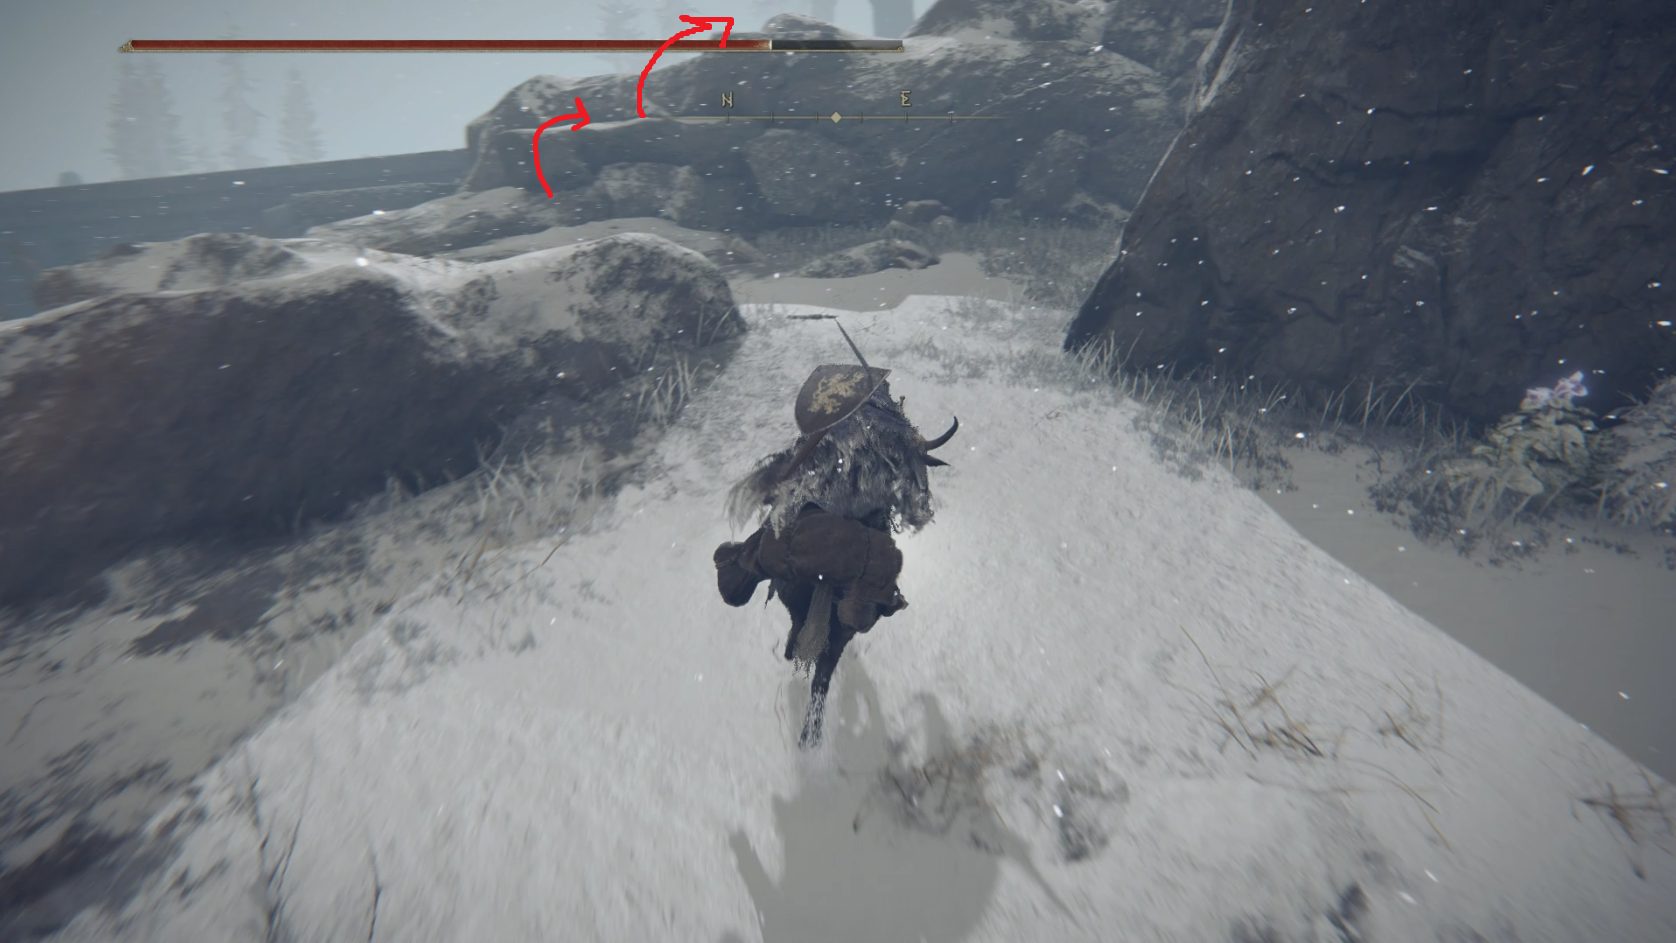
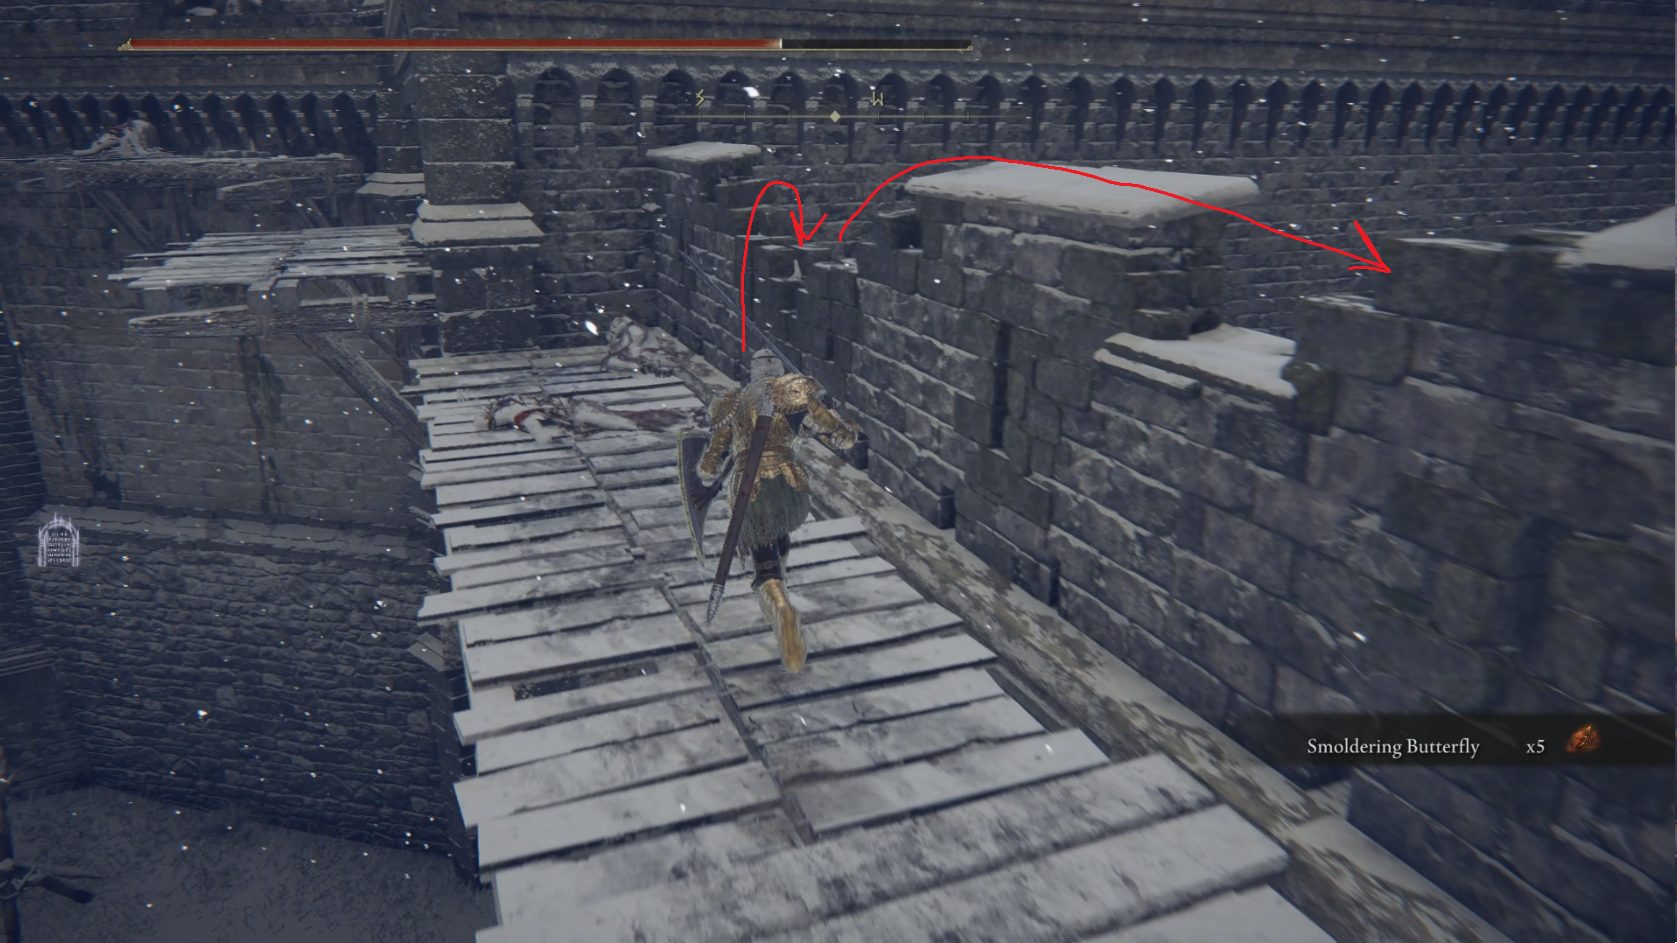
Follow the path east a bit further, and stay on it as it curves northwest around the rocks, and you’ll soon come to a 4-way intersection. Go left (downhill to the southwest) and use target-lock as soon as you turn to find a hawk hiding on the right. Clip its wings and continue downhill — at the end of the path here you’ll be able to snag an Arteria Leaf. Then, go northeast back uphill, where you’ll find a corpse with x4 Smoldering Butterflies to the left of the path. Keep going northeast, and you’ll drop down onto the path and get a nice view (if it isn’t too foggy).
Butterfly corpse and the way forward
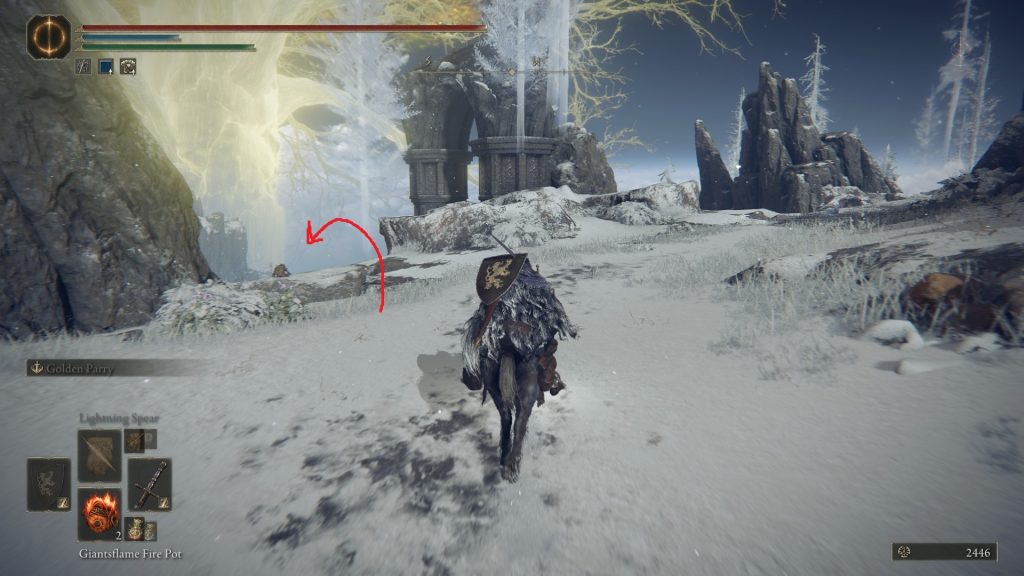
There are a lot of other people here enjoying the view, but fortunately, they’re all very distracted by the scenery. Go a bit further down the hill and you’ll be able to summon your favorite spirit ash if you want to clear this area (although it isn’t necessary). If you don’t want to kill everyone here, go down the main path, then turn left (north-northwest) to head onto the closer ledge that overlooks the bridge. Ignore the enemies and just loot the two corpses here for x3 Arteria Leaf and the Briars of Punishment sorcery.
Then go back to the main path and cross it heading southeast — keep going this direction onto a hard-to-spot path that leads to the Giants’ Mountaintop Catacombs.
These catacombs are a bit of a maze, but we’ll (soon) have a guide to make things easy for you!
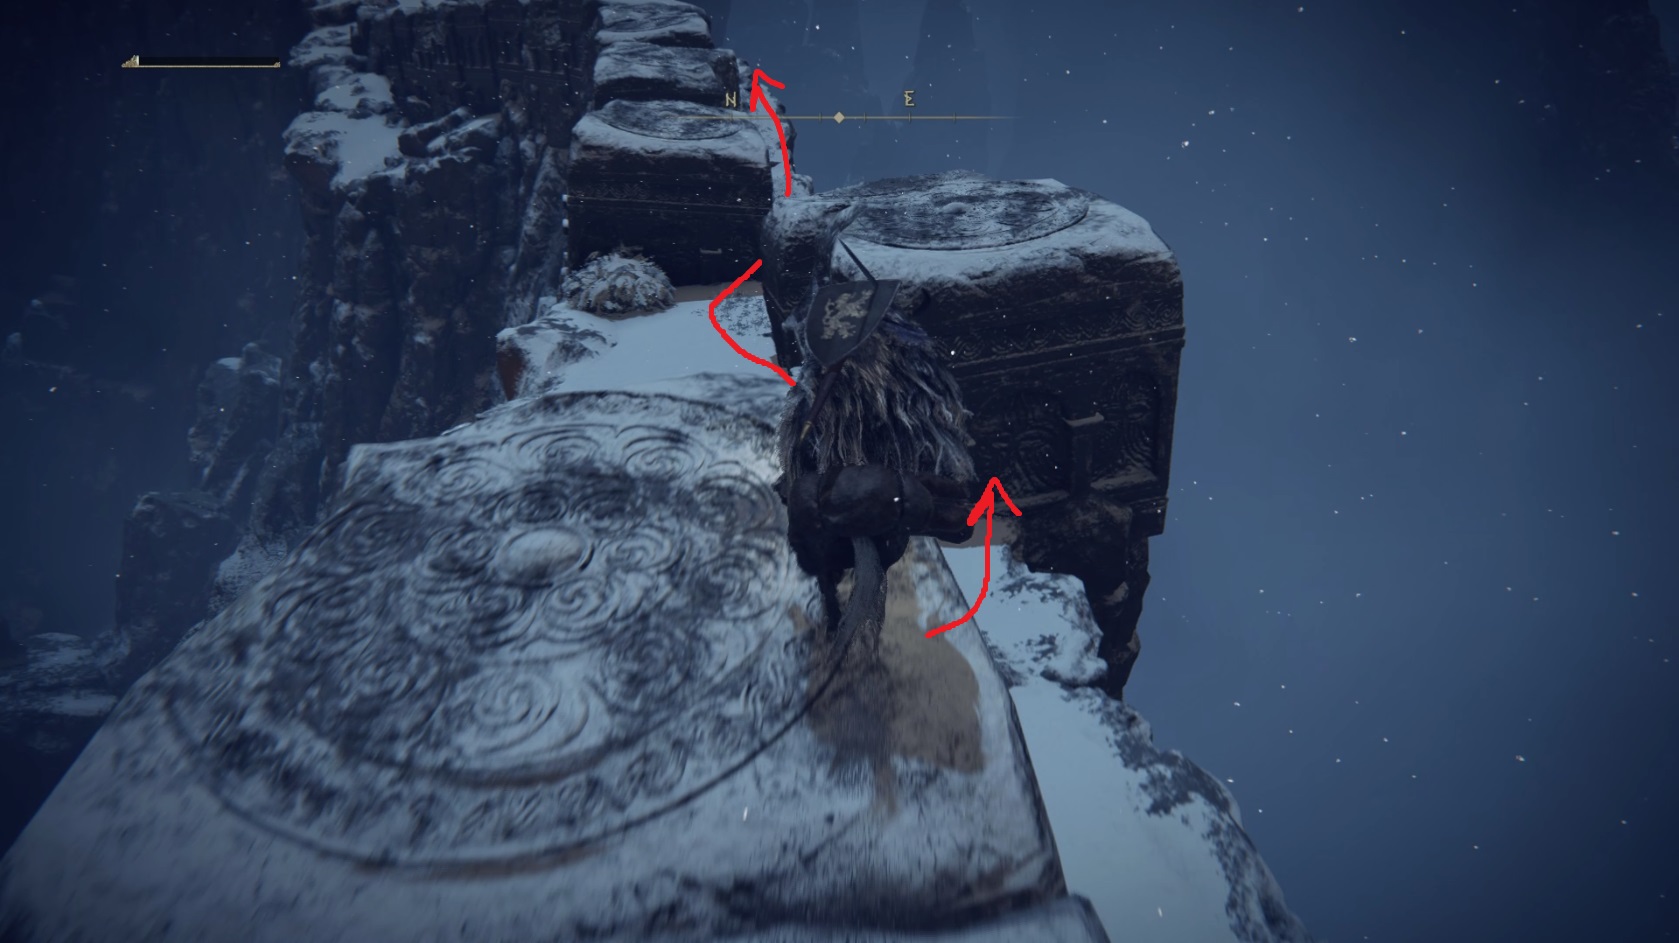
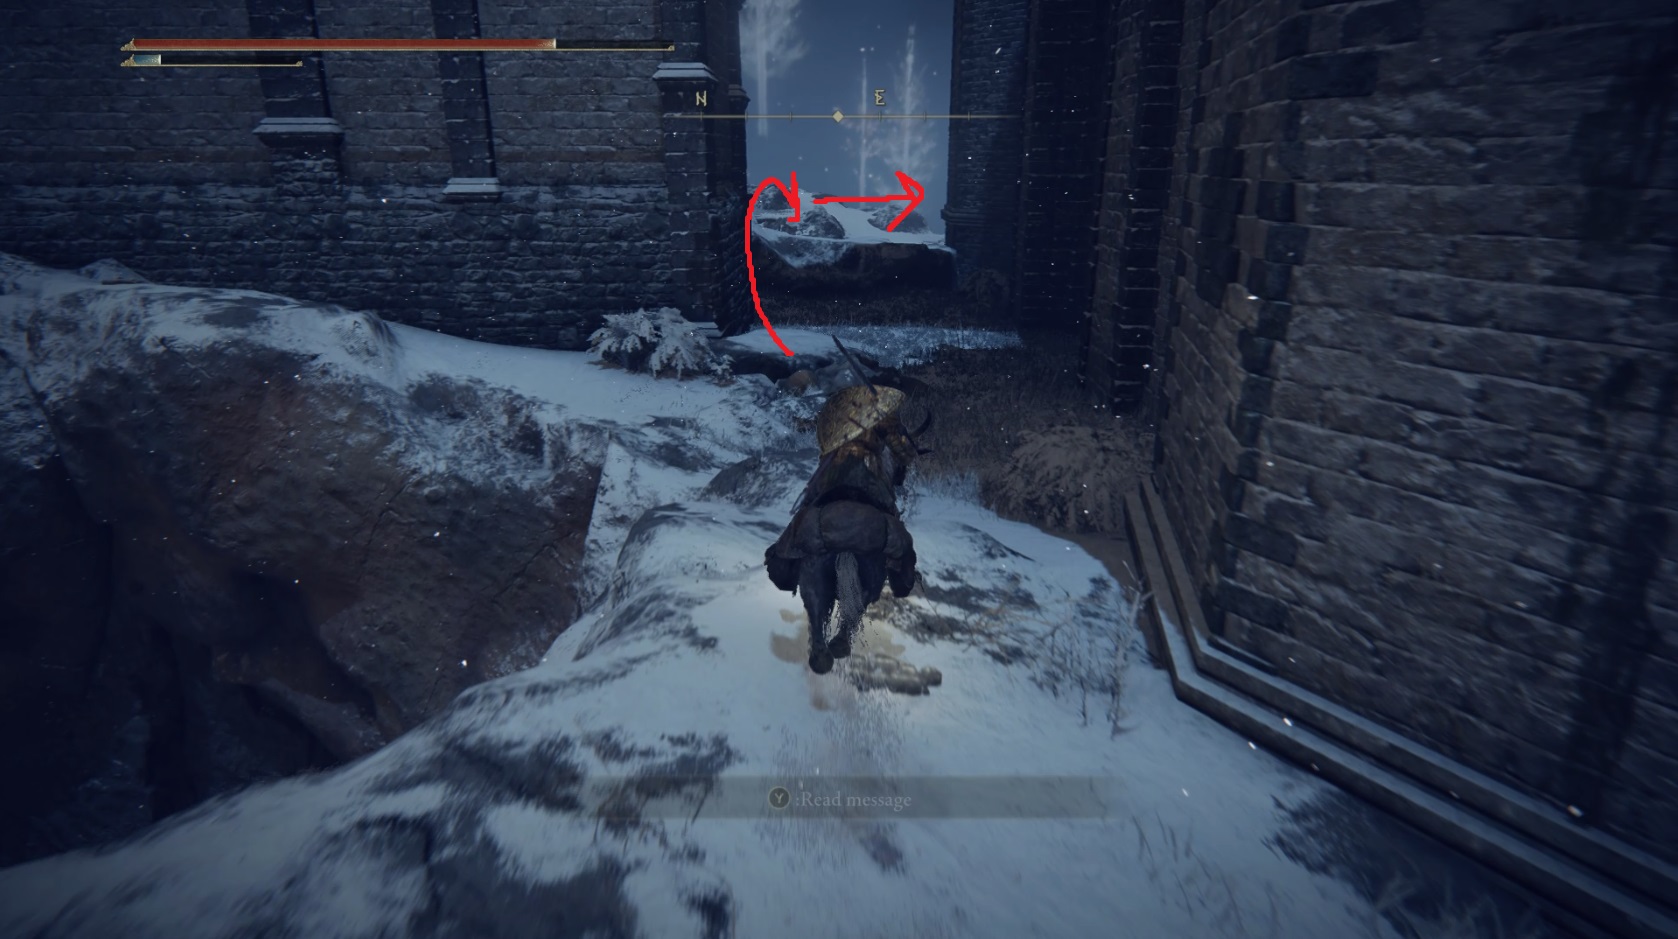
From the Giants’ Mountaintop Catacombs entrance, go north, riding quickly past the enemies to make your way out onto the precarious “bridge” that leads further north. When you’re about halfway across, look for a corpse in a chair on the left — it’s easily spotted from the bridge, so don’t fall off trying to look over the edge for it. Grab the Lost Ashes of War from the corpse and continue north. At this point, you’ll soon come under fire from a giant archer. Fortunately, there’s cover — when you first come under fire, you’ll be able to hide behind part of the bridge just ahead. Once you hear an arrow hit your cover, head to the second piece of cover — from here, you’re actually safe from the archer, and you can continue around the cover and northeast up the narrow path on the right of the large stone block.
You’ll be exposed once you come back up level with the bridge, so dash quickly forward, and then drop down to the left where a corpse is slumped against the bridge. If you stand up against the wall, right on top of where the corpse is, the arrows will just barely hit the wall in front of you.
Hop down ASAP“Not even close”
The corpse you’re so unceremoniously standing on has a Golden Rune [7], so make sure you grab it — once the next arrow hits in front of you, dash north, grab the x4 Rainbow Stone and x2 Drawstring Holy Grease from the other two corpses just ahead, then continue northeast to make your way off of the bridge. Once you get close enough to the giant, his arrows should hit the ground in front of him, but you can hide behind cover when he prepares to fire just in case.
Make your way around the rocks to the giant archer and start hitting his feet — not only for revenge, but because otherwise he’ll keep shooting you as you explore the area beyond. Dodge his stomps and he should fall pretty quick — run around to his left side and stab his glowing hole once he falls to the ground, which should finish him off. Northwest of the giant archer is a corpse with a Golden Rune [13], and there’s also an Arteria Leaf blooming nearby.
From the corpse, ride northeast through the huge pillars. Beyond them to the east-northeast is a huge loot beetle rolling around a Somber Smithing Stone [8]. After smacking the beetle around, continue east through the arch, and you’ll pass some broken columns and then find a corpse with x6 Soft Cotton. Then go right around the rocks ahead and go north uphill, crossing over the arch you just went under.
As you make your way up the path, you’ll see a huge arch supported by two columns — the Ancient Snow Valley Ruins site of grace sits at the base of the left-hand column. Rest here, then — if you’re following Millicent’s questline — speak to her nearby and exhaust her dialog.
If you want an Arteria Leaf, go east-southeast to the nearby rocks, then follow the steps in the GIF below to get onto the high ground and grab the crafting material.
Next, follow the hard-to-see path northeast and then north, and you’ll soon reach a frozen river, patrolled by another giant. Feel free to ignore it (and the rest of the enemies on the frozen river for that matter) — head left to go west, following the frozen river past a number of demi-humans. You’ll soon come to the support columns of a bridge, where demi-humans and bats are battling each other. If you like, you can intervene here and pick up some runes for your trouble — some of the bats in this area seem to occasionally drop a Golden Rune [10].
Beyond the battle, further to the west, is the Shack of the Lofty, which is easy to spot amidst the snow. Inside, you’ll find the Traveling Maiden set. The pile of giant corpses south-southeast of the shack has x3 Warming Stone and an Invigorating White Cured Meat on top, plus a Smithing Stone [7] on the northeastern side of the pile. Grab the items and then continue south to the Spiritspring jump. Use it to jump up to the northeast, and then turn right (south-southeast) and continue downhill until you find the Hermit Merchant at the end of the path. Check out his wares, then head back up the path the way you came. When you get to where you landed after the Spiritspring jump, you’ll need to jump up the left side of the rocks to get onto higher ground.
Once you’ve jumped up the rocks, you’ll find yourself in front of a bridge. Now we’re going to go grab a site of grace in order to avoid having to come all the way back up here if you die. To do this, head over the nearby bridge heading north-northwest. On the other side, a huge spectral skeleton will come out of the ground and attempt to blast you with what’s essentially a laser beam — but he’s really slow, so just dash past him.
Turn right once you’re on the other side of the bridge and follow the path as it leads northeast, then east, heading uphill. There will be a corpse with a Golden Rune [11] on your right as you go up the path, and another Golden Rune [10] just to the right of the path right where the path levels off — at this point, you can leave the path and continue due east — you’ll soon reach a drop, and below you will be the Snow Valley Ruins Overlook site of grace. Hop down and activate it, rest if you need, and then from the site of grace, look to the south-southeast — see the bridge there? That’s your next destination.
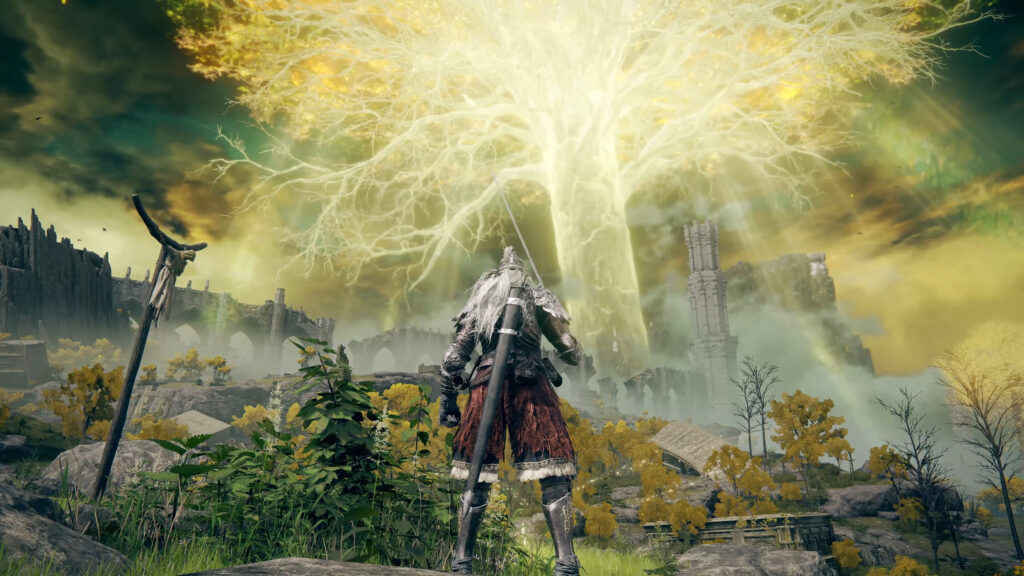
To reach the bridge, you’ll need to go northwest and then turn left around the rocks to head south, then continue the left turn to go east-southeast across the bridge. On the other side, you’ll be able to summon your spirit ash of choice, then continue south towards the foot of the Minor Erdtree to fight the Erdtree Avatar. This is just like all the other ones you’ve faced, with one exception: at ~50% HP, it will summon another version of itself. Both can be damaged (they have a shared healthbar), but it does complicate the fight slightly. Crafting Fire Pots (or even better, Giantsflame Fire Pots using the Fire Blossoms found in this area) before this fight is helpful, since you can throw them from horseback and stay away from the Erdtree Avatar once it duplicates itself.
Once you defeat the Erdtree Avatar(s), continue southwest past the Minor Erdtree, and you’ll soon find the path again. Follow it as it curves west — you’ll encounter a number of Demi-Humans here, including a chieftain, but you can ignore these foes. The path will bear right, and you’ll see a demi-human sitting on the edge of what appears to be a cliff — head over to him and you’ll be able to drop down onto a corpse with a Golden Rune [10] (although it’s got a few more demi-humans hanging around it).
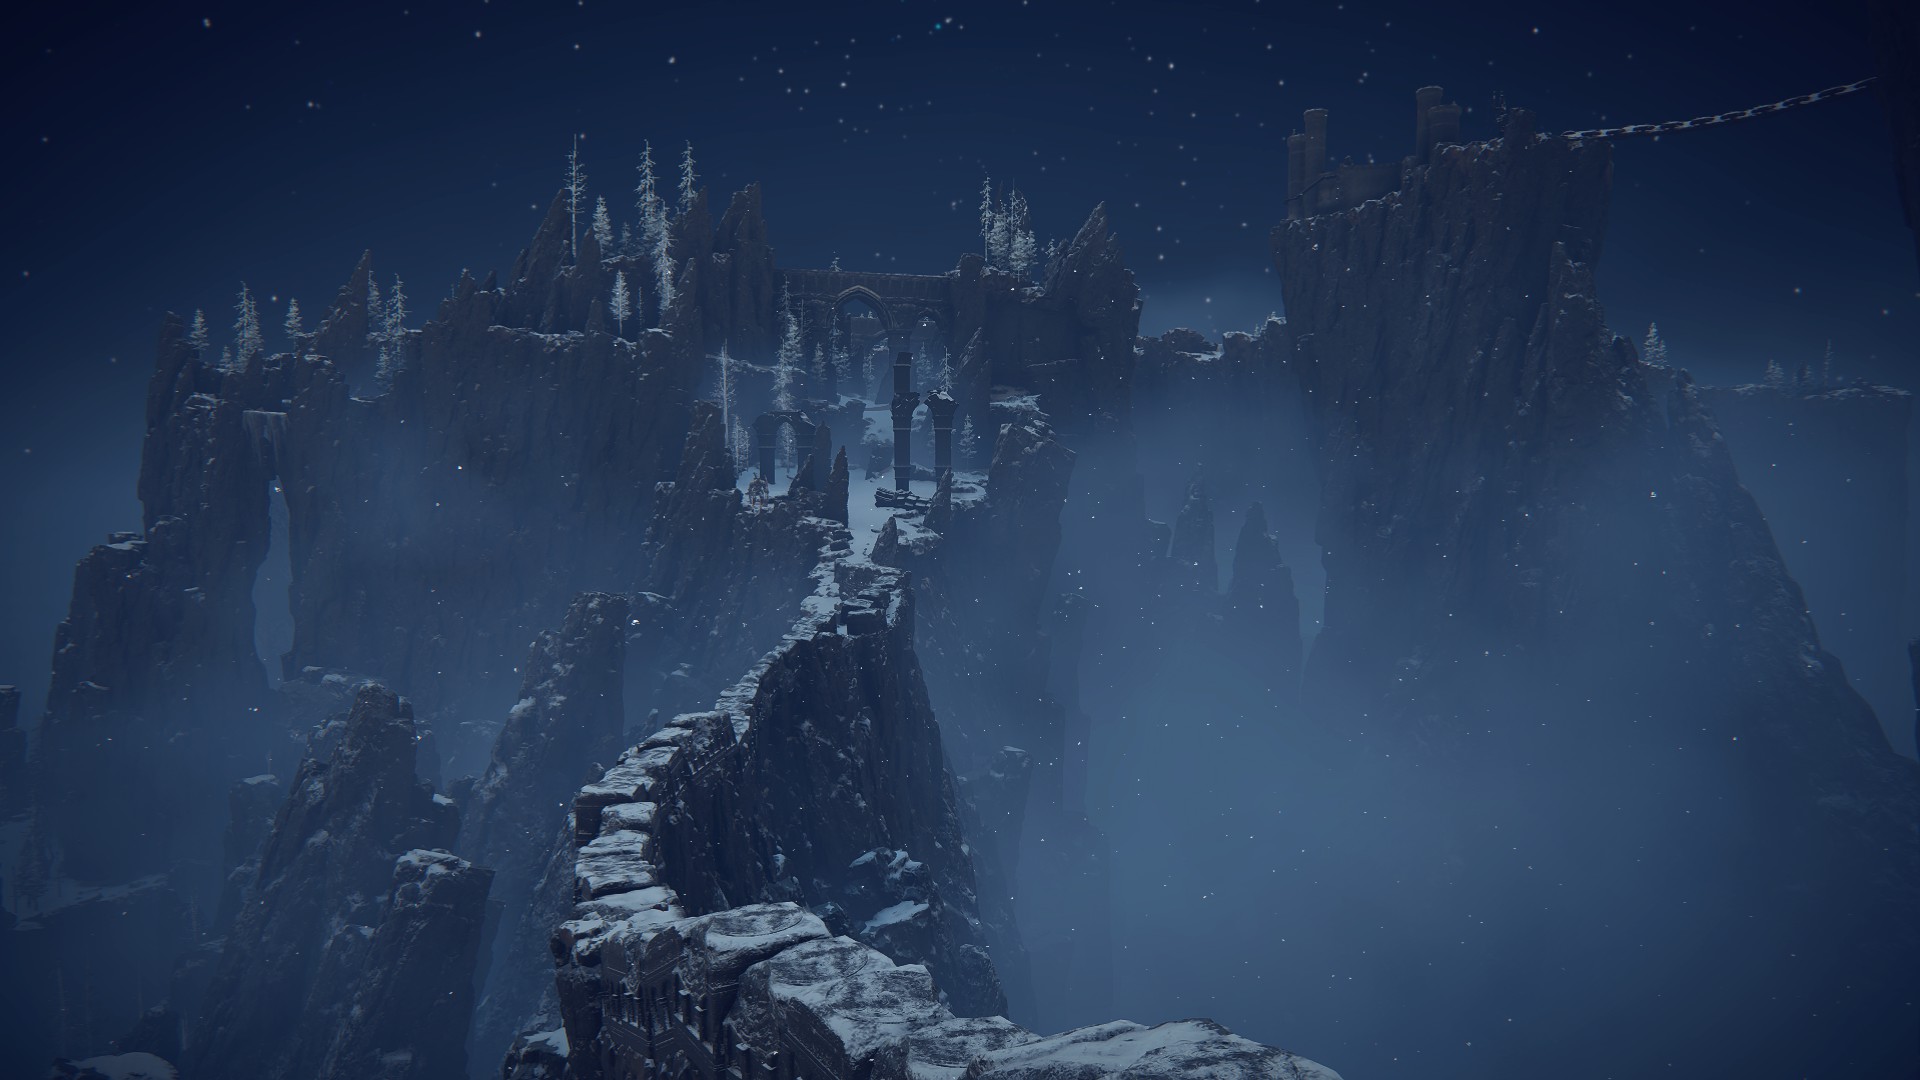
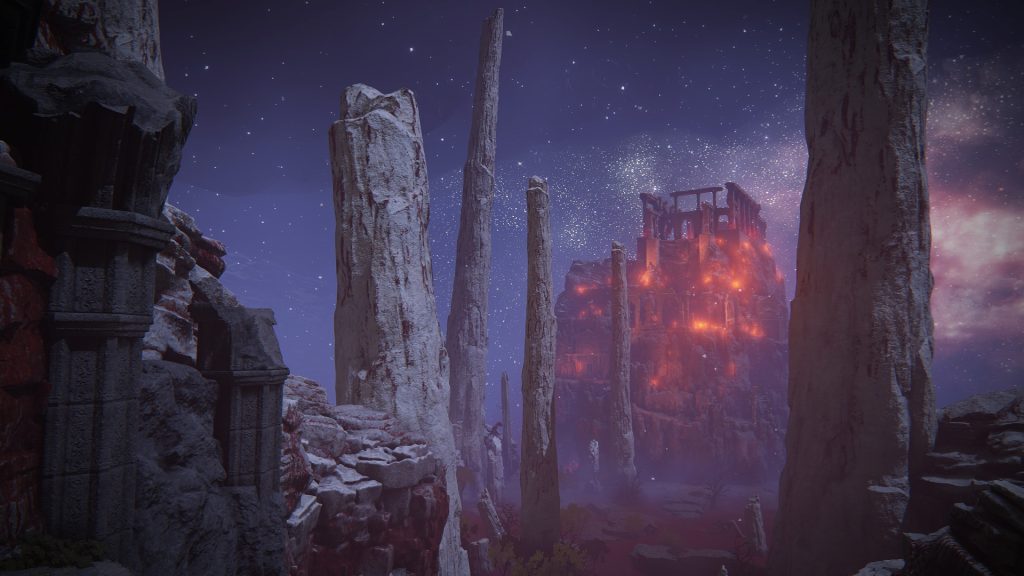
Jump back up to the path and continue west-northwest across the bridge. On this bridge, you’ll find a corpse in a chair with a Somber Smithing Stone [9], and you’ll also meet Goldmask and Corhyn if you’ve been following their questline — exhaust their dialog before continuing across the bridge. On the other side, follow the path downhill as it curves north, then head northeast into the Stargazers’ Ruins.
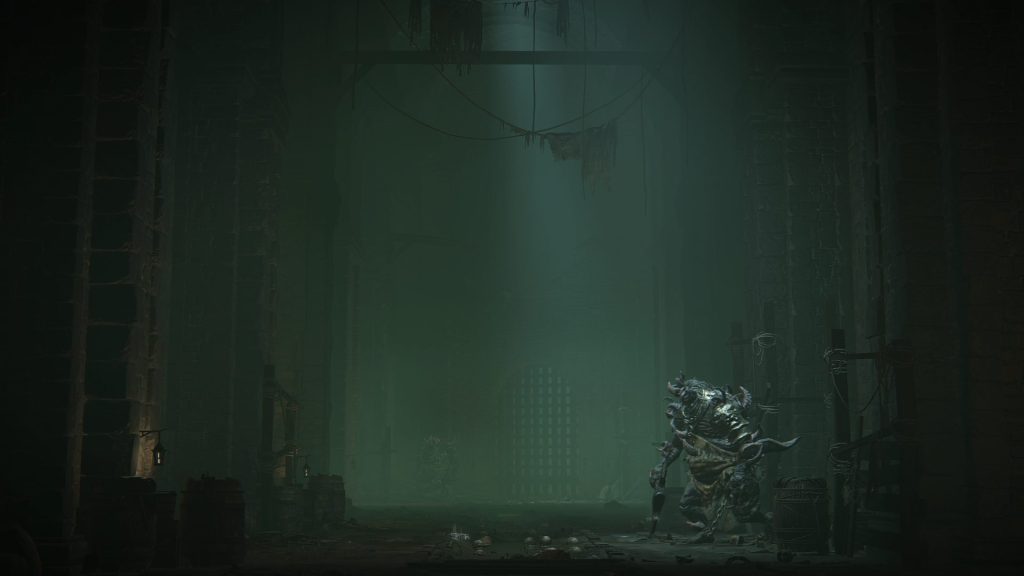
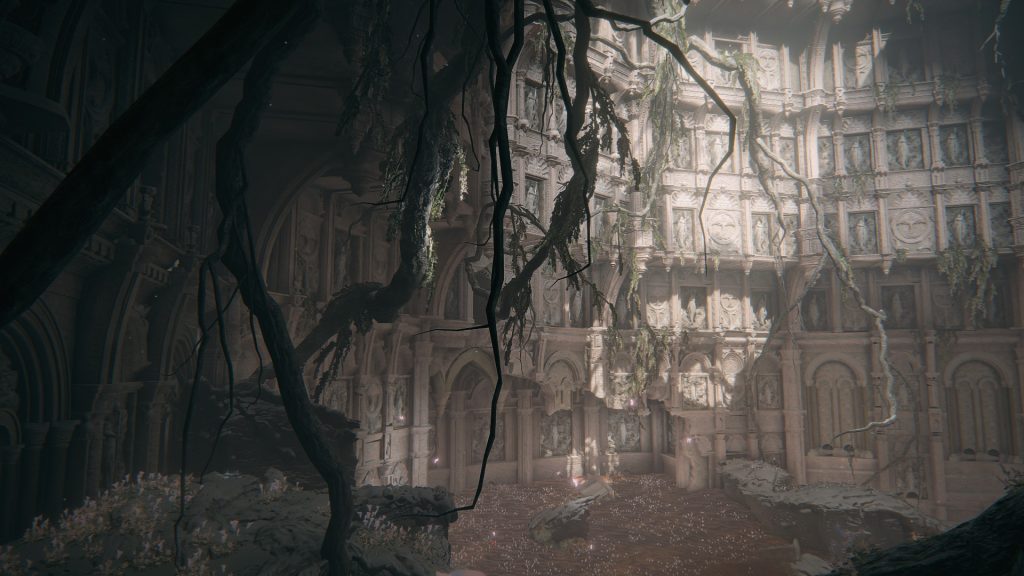
Make sure you don’t summon any spirit ashes to help you kill the bats here, as you’ll need that cooldown soon. Head into the central building of the ruins, killing any bats that aggro — inside, you’ll find a poor sweet Jellyfish who misses her sister. Summon the Jellyfish Ashes to reunite the two sisters — this will unlock the seal at the bottom of the nearby stairs (plus give you the Fancy Spin gesture), and you’ll be able to enter and open the chest containing the Primal Glintstone Blade.
The central building
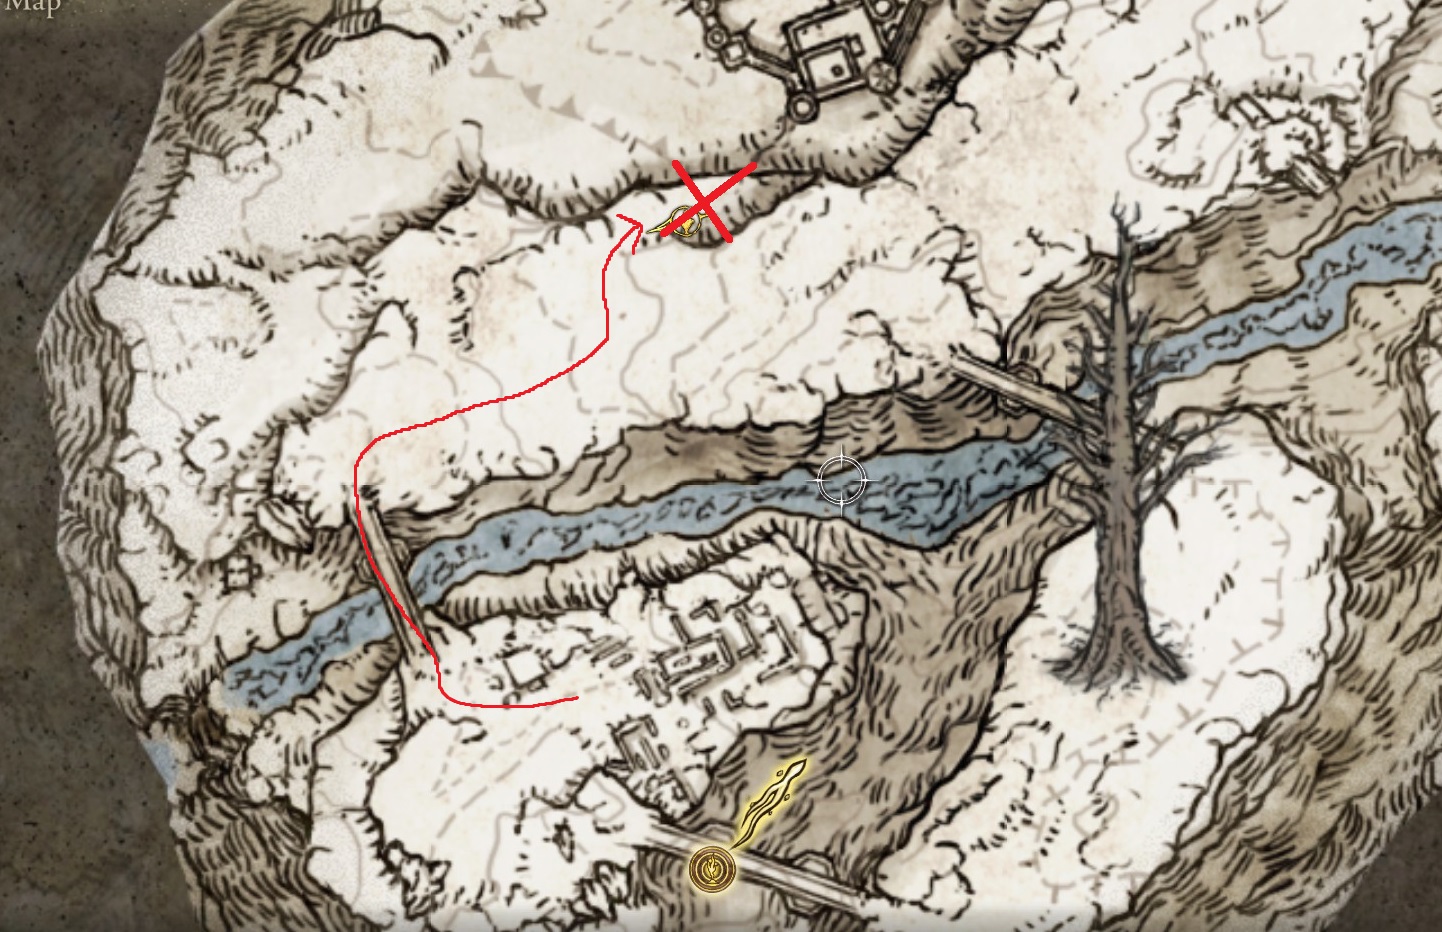
Go back up the stairs and then leave the building through the northeastern doorway. Outside, continue up the stairs, deal with the three bats, then in the far right corner of what’s left of this building, you’ll find a corpse with x2 Freezing Grease. There’s nothing else here, so head southwest, back to the entrance to the ruins, then turn right to head north-northwest towards the bridge once again. Before you cross the bridge, open your map and place a beacon at the location indicated below — it can be challenging to find (and explain how to find!) where we’re going next.
X marks the spot (that you should put a beacon down) — a path is also indicated to help you with reaching the marked location
Once you’ve placed your beacon down, follow the path — as in the image above — by first crossing the bridge to the north-northwest. Do so rapidly, as a huge skeleton will once again come out of the ground and shoot a laser out of its eye. Turn right at the giant skellington and continue northeast. Keep moving so you don’t get hit by lasers, or by the other giant skeletons that come out of the ground and try to slap you. If you didn’t grab it earlier, you should see a corpse on your left with a Golden Rune [10], right where you need to turn off the path to reach the beacon.
If you want another Arteria Leaf, you can make a detour to the southern edge of the ridge — the leaf is guarded by a few skeleton snails (see map location).
Grab the item and continue off the path, heading directly to the beacon marker, where you’ll find a Tibia Mariner. This one doesn’t have a boss health bar, but it also doesn’t summon any friends — the handful of skeleton snails (let’s call them Skelly Shellies) in this area (and the boss’s impressive HP) are its only advantages. When it dies you will receive Helphen’s Steeple and a Deathroot. Next, we’re going to go fight a Death Rite Bird, so if you used up a lot of resources on the Tibia Mariner, you may want to teleport back to the Snow Valley Ruins Overlook site of grace. However, there’s a Stake of Marika near the bird, so unless you’ve got a Rune Arc active you want to protect it’s easier to just head straight to the boss.
Head back the way you came onto the path and continue downhill (southwest) — when you see the bridge and enter more open ground, curve to the right until you’re heading north, and you should see a summoning pool in the distance. Take a left at the nearby tombstones and continue southwest downhill — soon you’ll enter a somewhat open area, and the Death Rite Bird will spawn.
The “curve to the right” described aboveThe path from the Tibia Mariner to the Death Rite Bird
Summons are available for this boss, and the terrain is such that it’s pretty easy to simply ride away if you don’t want to die and don’t think you can win the fight. Interestingly, this Death Rite Bird will spawn even if it’s not night.
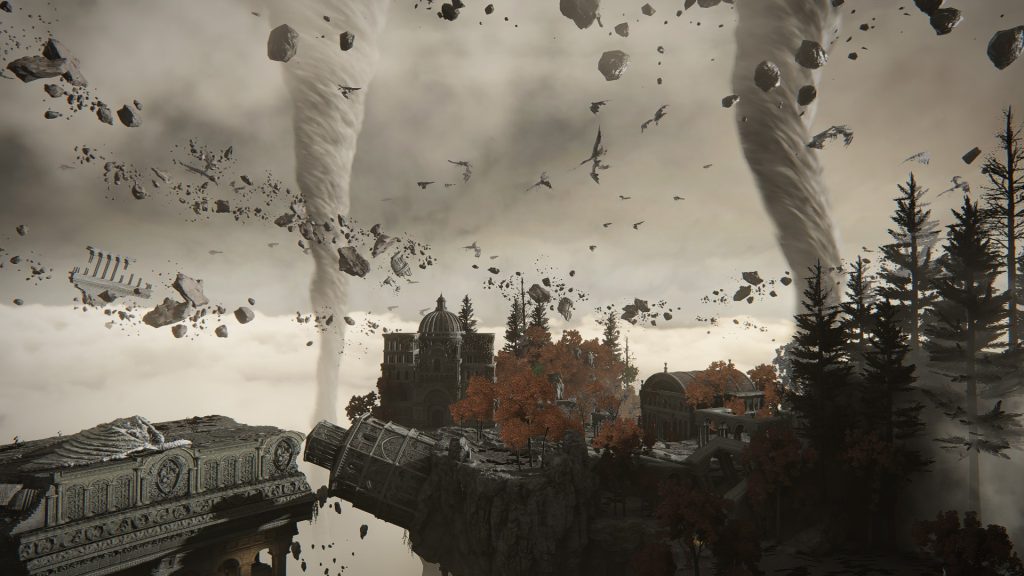
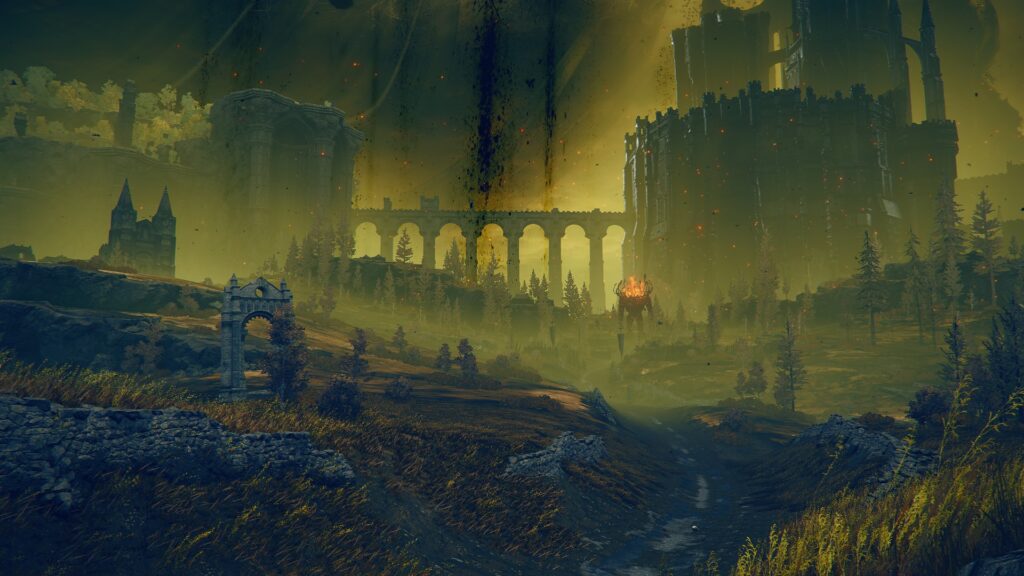
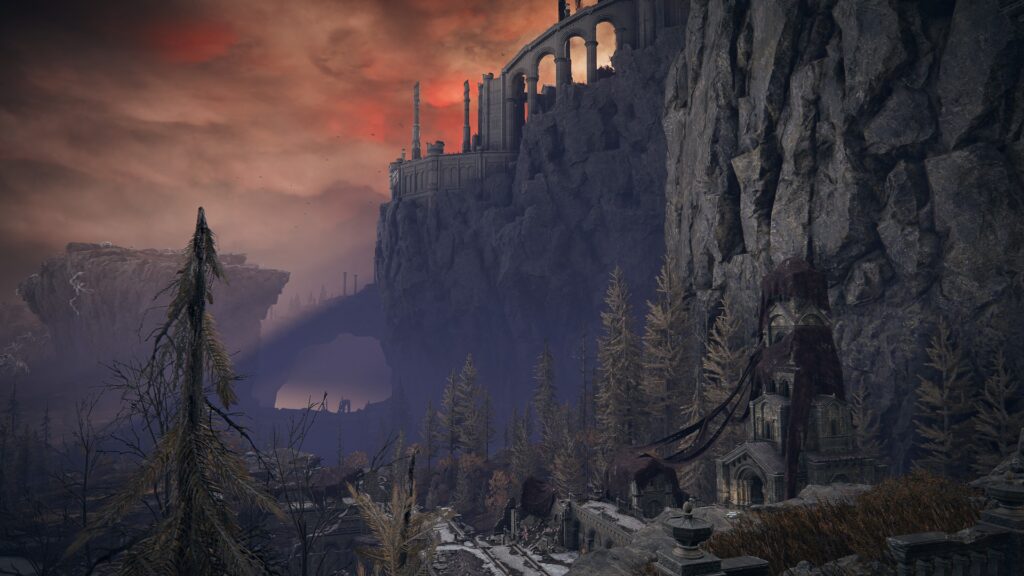
In the area in which the Death Rite Bird appeared, there is a stone quarter-sphere on the north-northwestern side of the cliffs where you can find Starlight Shards. Next, head back to the “entrance” of the boss area and turn left to head northwest down the path that leads to the low ground to the north (it’s visible on the map). It will wind downhill a bit, and you’ll end up heading east-northeast towards Castle Sol.
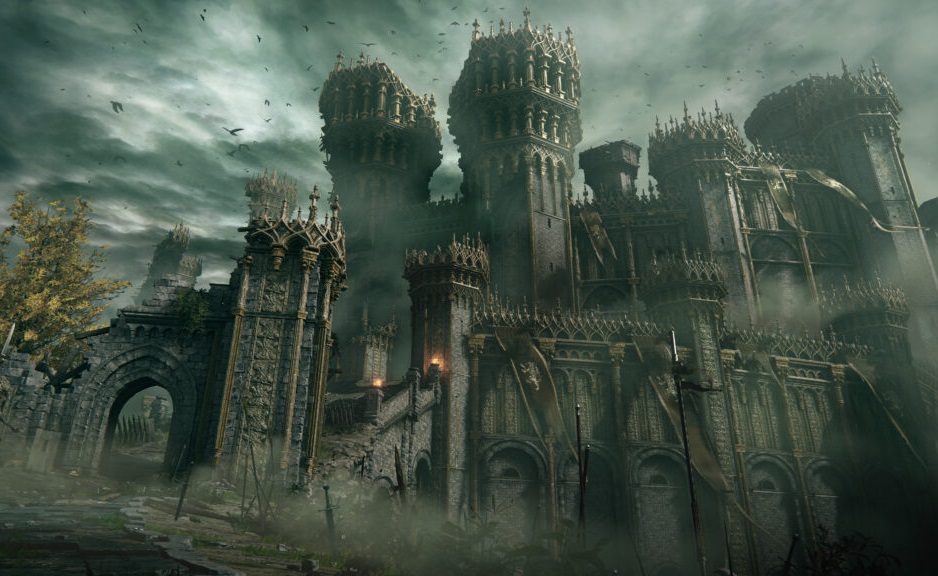
You’ll pass a few lightning-struck areas with Fulgurblooms you can harvest, and there is also a walking mausoleum out in front of the castle. It’s hard to tell thanks to all the ice and snow, but there are skulls on the mausoleum’s feet you can knock off to make it settle down — unless you want to listen to the bell bing bonging the whole time you’re in Castle Sol, it’s a good idea to clean the mausoleum’s feet before you go inside. Grab the Castle Sol Main Gate site of grace by the castle’s front steps, but don’t go inside yet! There’s some loot behind the castle to grab first.
From the site of grace, go north and jump up on the rocks at the corner of the castle, then continue northeast around the castle walls (1). There are lots of nooks and crannies back here, but no items, so continue east-northeast and straight through the gap between the walls ahead (2).
12
You’ll have to jump over a rock to continue forward, and then you’ll be behind the castle. To the southeast is a graveyard with a fairly skimpy assortment of Golden Runes, but free is free. Once you’re finished grave robbing, head south and make your way around the corner of the castle there. You’ll encounter two hawks here — if you’re fast you can kill one before they’re aware of you. Continue southwest and you’ll see some Nascent Butterflies hanging out on your left. From there, continue west until you reach a drop (don’t go too fast or you might fall off) — a corpse with a Somber Smithing Stone [8] sits on the edge of the rocks. Grab it and then drop down, and you’ll find yourself back at the front of Castle Sol — time to head in!
After you’ve cleared Castle Sol, you can teleport to the Snow Valley Ruins Overlook site of grace — with the western section of the mountaintops cleared, it’s time to clear the other side of the map.
This walkthrough continues in the Eastern Mountaintops tab!
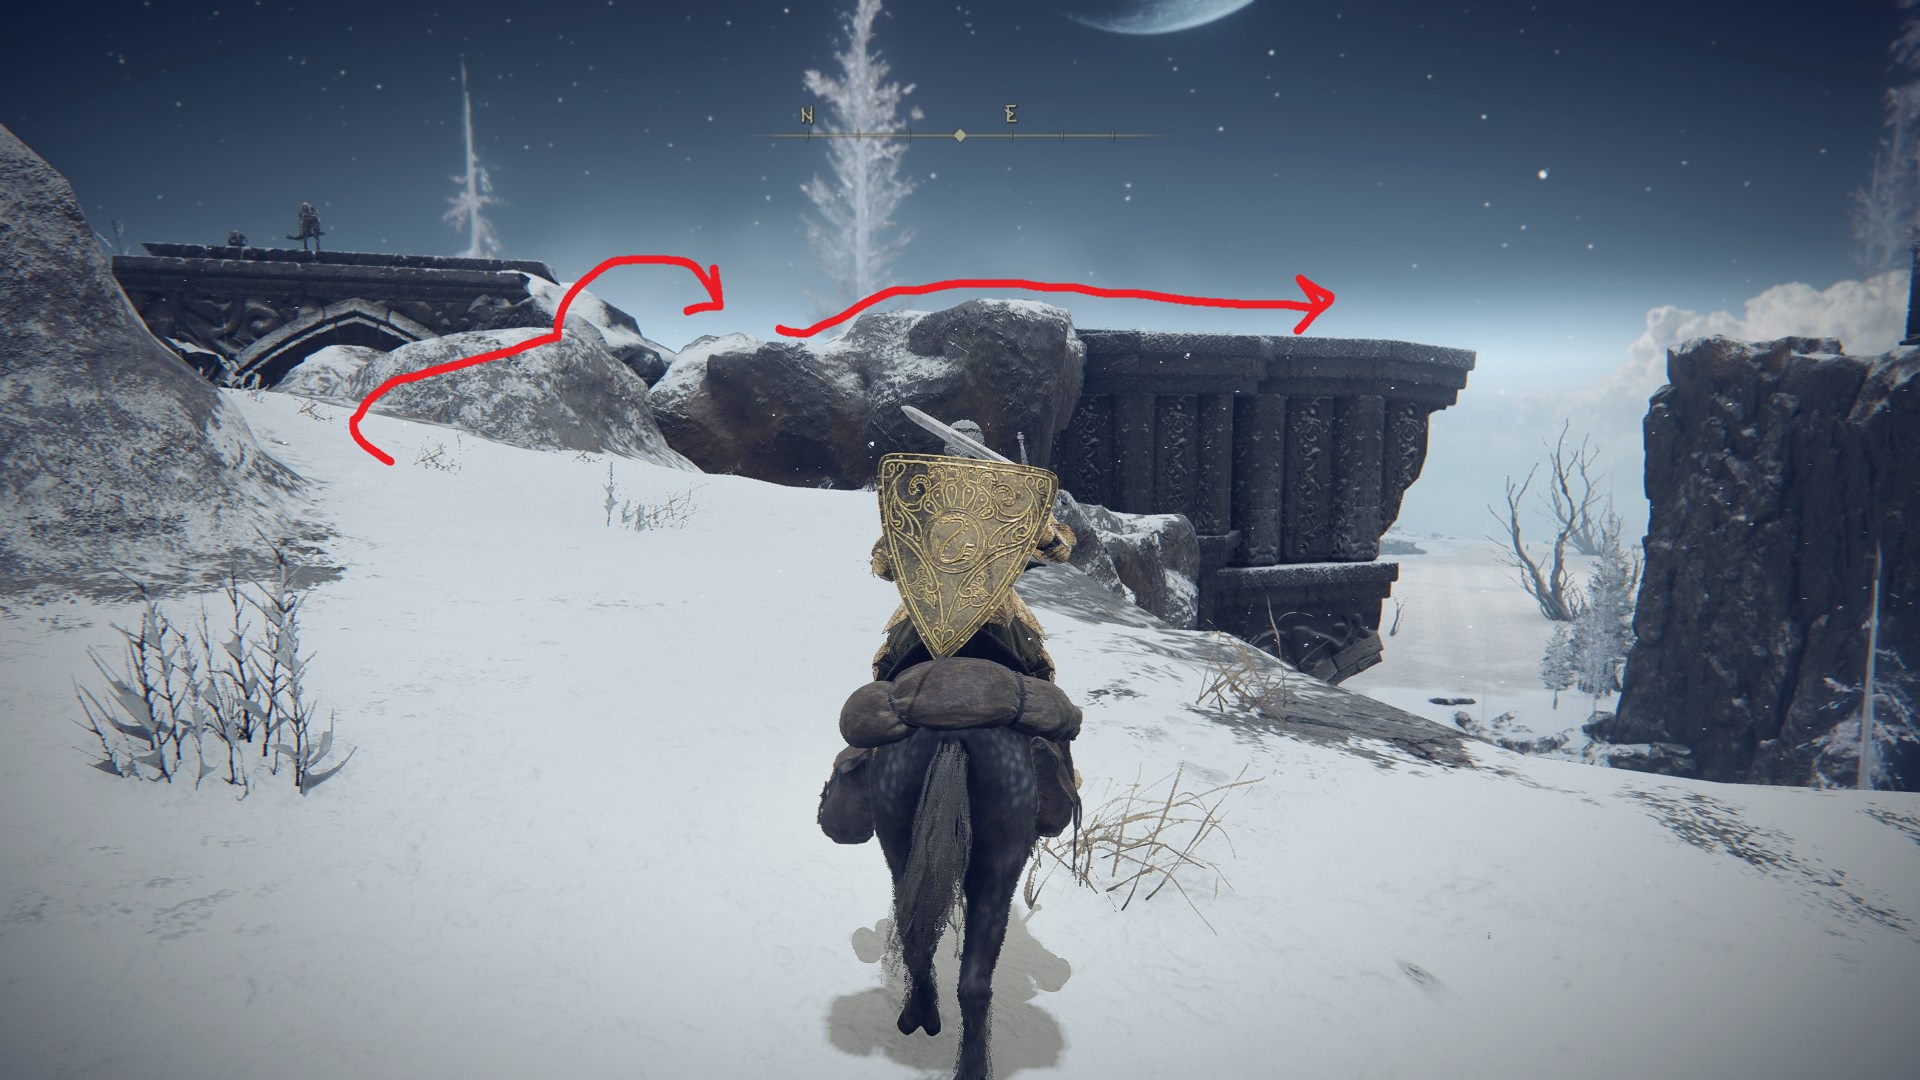
From the Snow Valley Ruins Overlook site of grace, head northeast along the edge of the cliff, towards the broken bridge. You can jump from the rocks pictured below onto another section of rocks that connect to the bridge, and then continue onto the bridge itself.
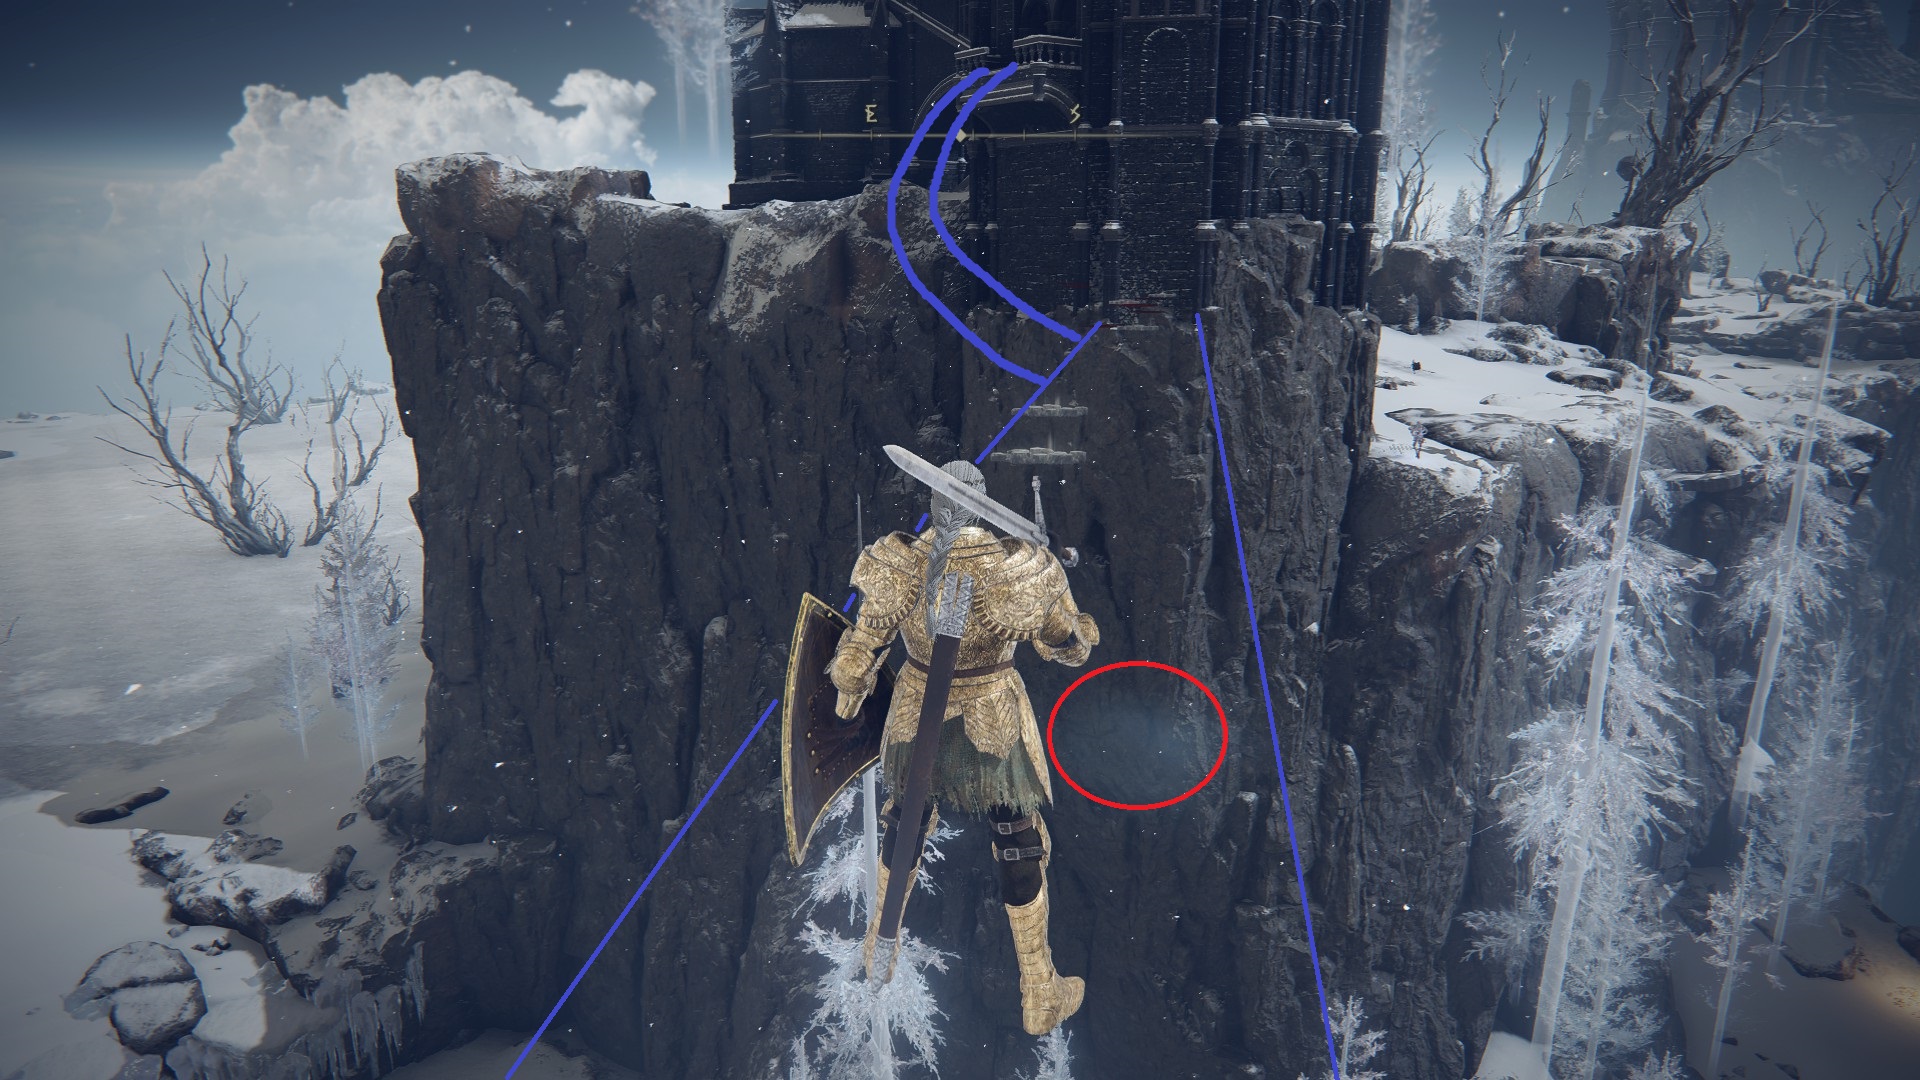
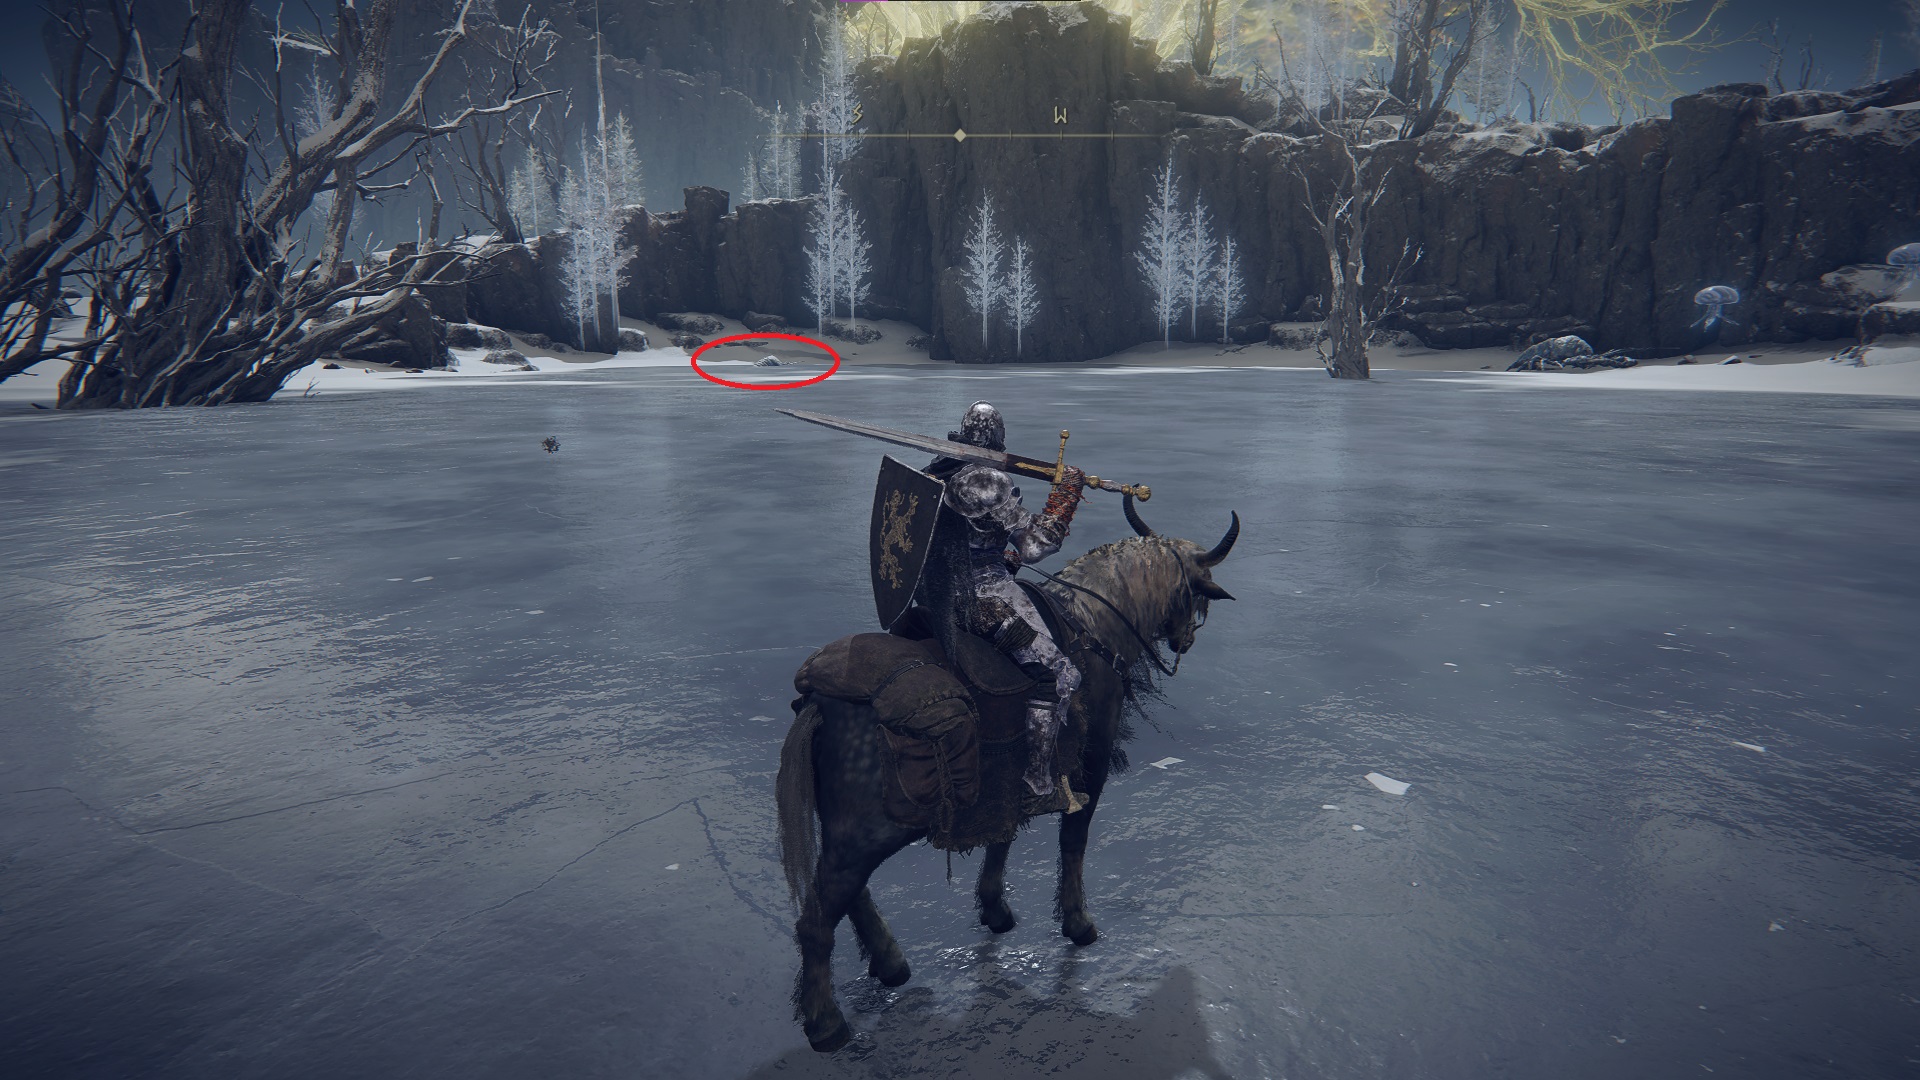
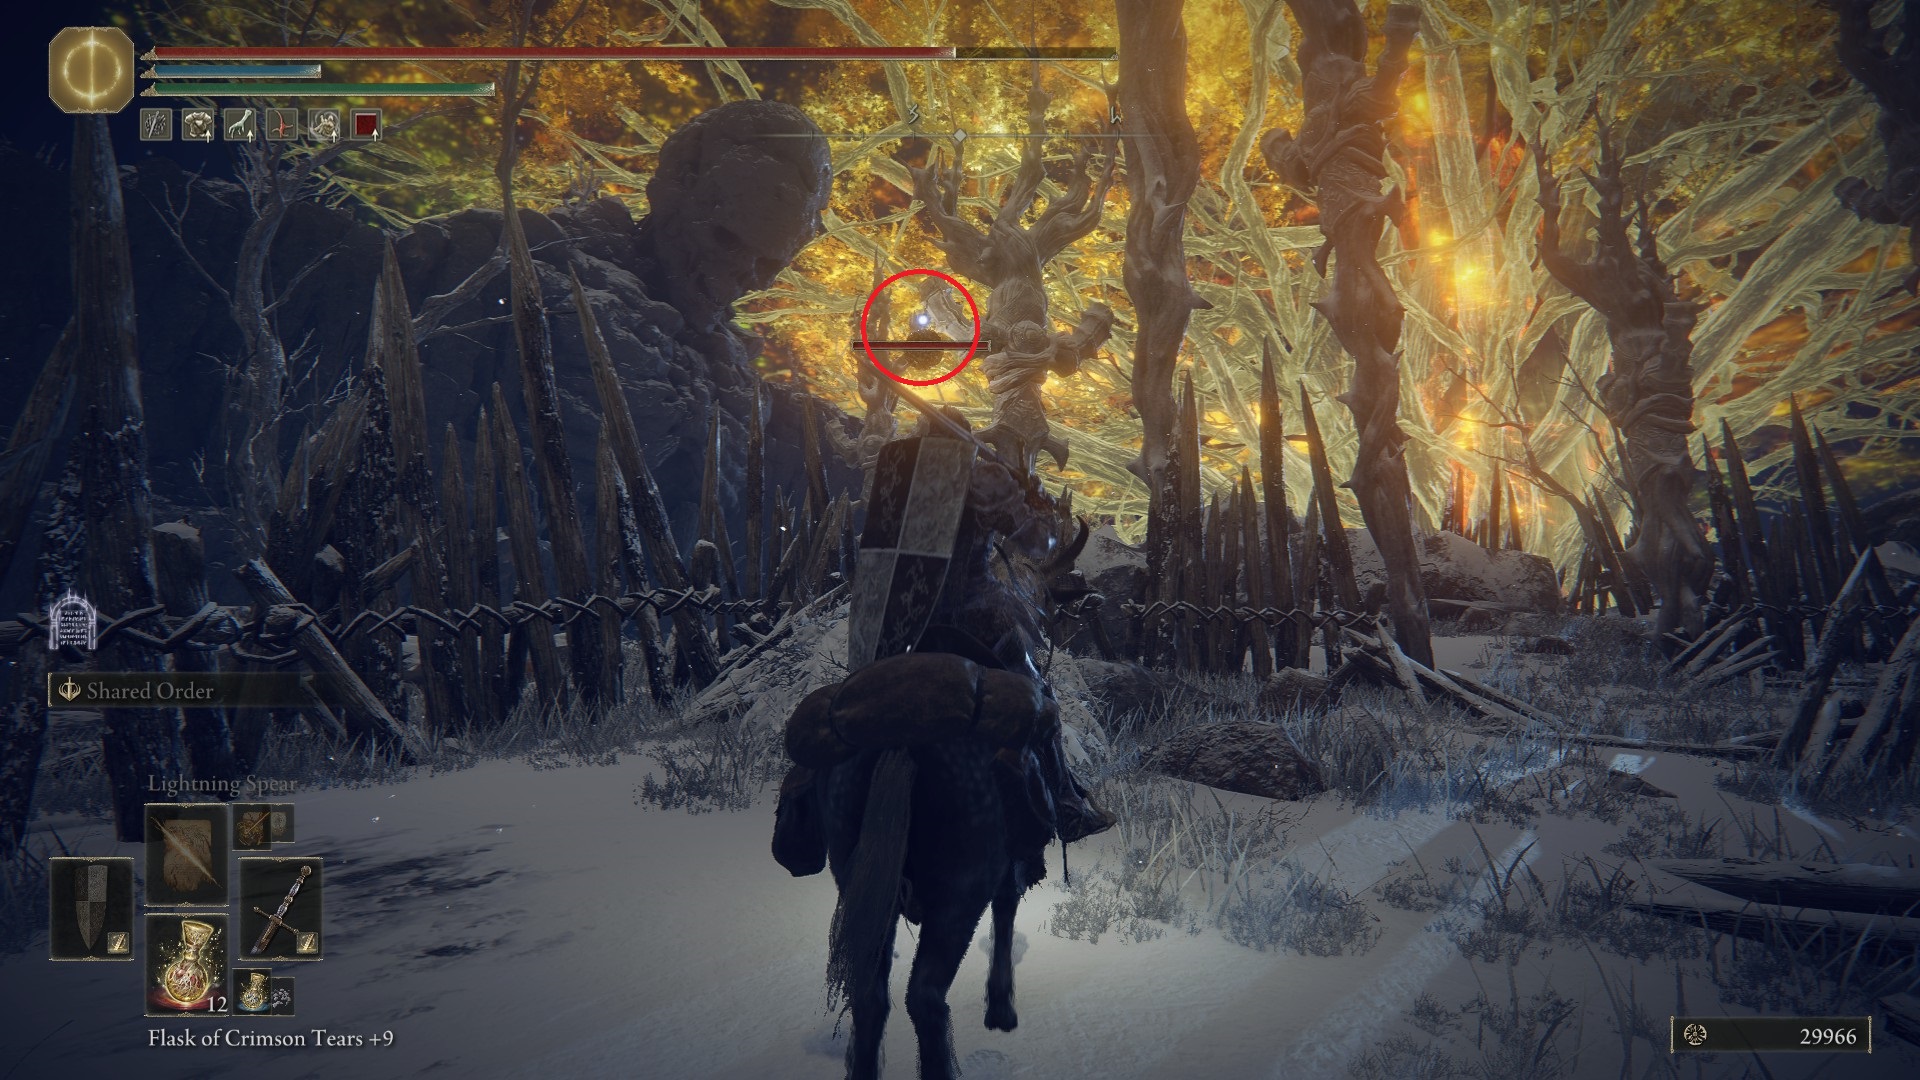
Then go stand in the center of the bridge, right at the broken edge — there’s an invisible bridge that runs all the way to the building across the valley. If you’re playing online there will probably be plenty of messages and bloodstains to guide you, otherwise you can look for the foggy blobs that indicate the path (see image below). The bridge runs in a straight line from the center of the bridge to the other side, but you can always use Rainbow Stones if you aren’t confident about your next step — toss them in front of you, and if they don’t plummet to the valley below, you’re safe to move forward!
Circled in red is one of the indicators of the path — they’re pretty hard to spot. The side path that leads up to the balcony (see below) is included on the bridge outline.
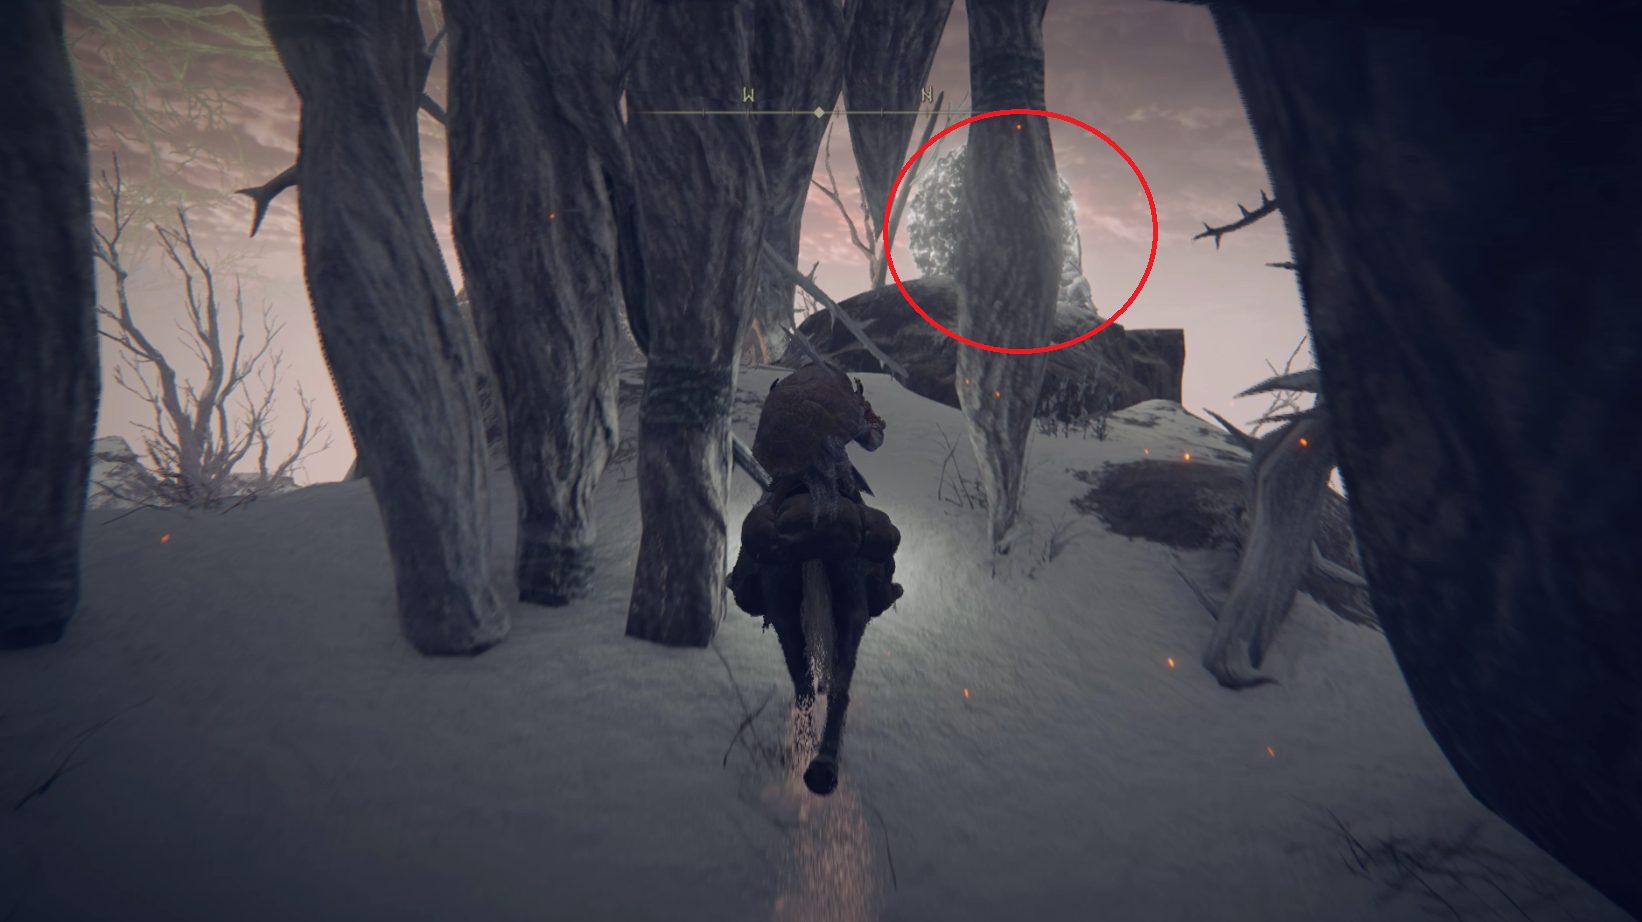
Continue about 3/4 of the way across the bridge, and start looking to your left — you should see more cloudy path indicators (plus more messages and bloodstains if you’re online). A path on the left of bridge leads upwards and east, then curves right. Follow these indicators of the path upwards and around the curve — the path leads to a balcony above the bridge. Again, you can use Rainbow Stones if you are ever uncertain about the way forward on the invisible path.
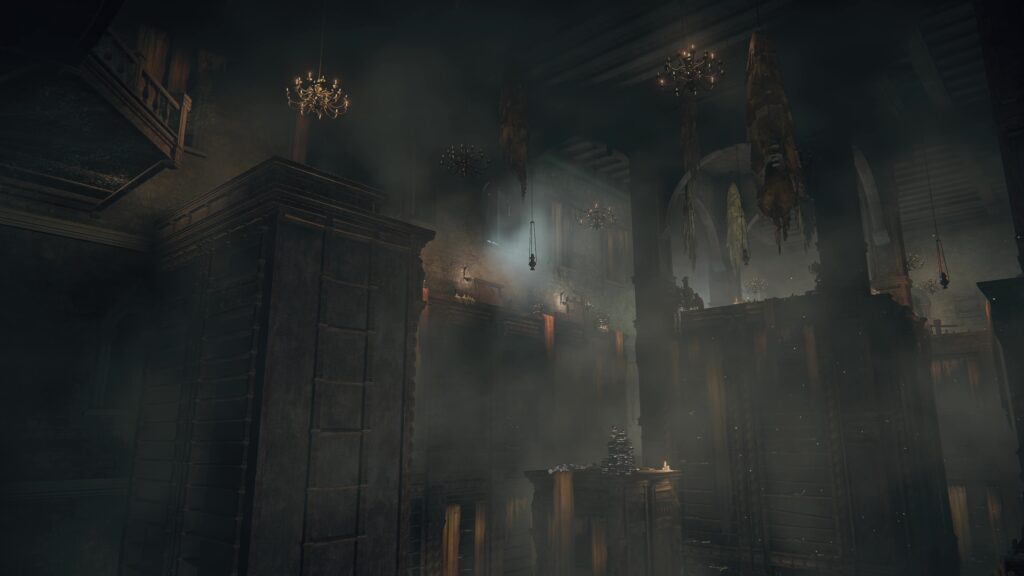
Once you’re safely on the balcony, you can grab the Nascent Butterfly flapping about above you, then enter the room. An avionette is sitting to the left on the floor, and a second will drop down from above. Be cautious about how you engage the sitting avionette, as it starts this fight in its “almost broken” phase and therefore flails wildly when it first attacks. Once both foes are dispatched, head through the eastern doorway that leads to a flight of stairs. Continue up them and then onto the elevator. Before you go through the doorway here, prepare for the marionette soldier around the corner on the right, just up the stairs. Past the soldier and further up the stairs you can find the Founding Rain of Stars sorcery in a chest at the top of the tower.
Make your way back down to the elevator, ride it down, then go back down the stairs to the room with the two (dead) avionettes. This time, head through the doorway to the south and down the stairs there — in the next room, you’ll find another avionette. Continue northeast through the hallway, and you can then head east from the next room to make your way outside. Take a left and continue around to the west, along the side of the building. You’ll soon be able to turn left, where you’ll see a corpse and an avionette. Watch out for the second avionette that will swoop down, and grab the x5 Old Fang from the corpse.
Go back to the front of the building and follow the path as it winds generally southeast. You’ll need to go off the road to pop some balloons — the first one is to the southwest, then the next one will be at the bottom of the hill. They’ll all give you a Golden Rune [12] when you do so, so it’s worth taking the time to pop ’em. There are lots of marionette soldiers around, but you can ignore them if you like — they can’t catch you when you’re on Torrent.
After popping the second balloon at the bottom of the hill, head southwest towards the wooden palisades. Before you continue through them, head onto the small rise with the trees on the right — from where you should be able to throw a projectile at the third balloon to pop it.
Follow the path past the first line of wooden stakes, and you should find a corpse with x5 Explosive Greatbolt near a cooking fire. Then continue southwest through the palisades (making sure to swing wide around the huge dogs) and you’ll soon come to another set of wooden defenses — on the right just before the palisades is the Whiteridge Road site of grace.
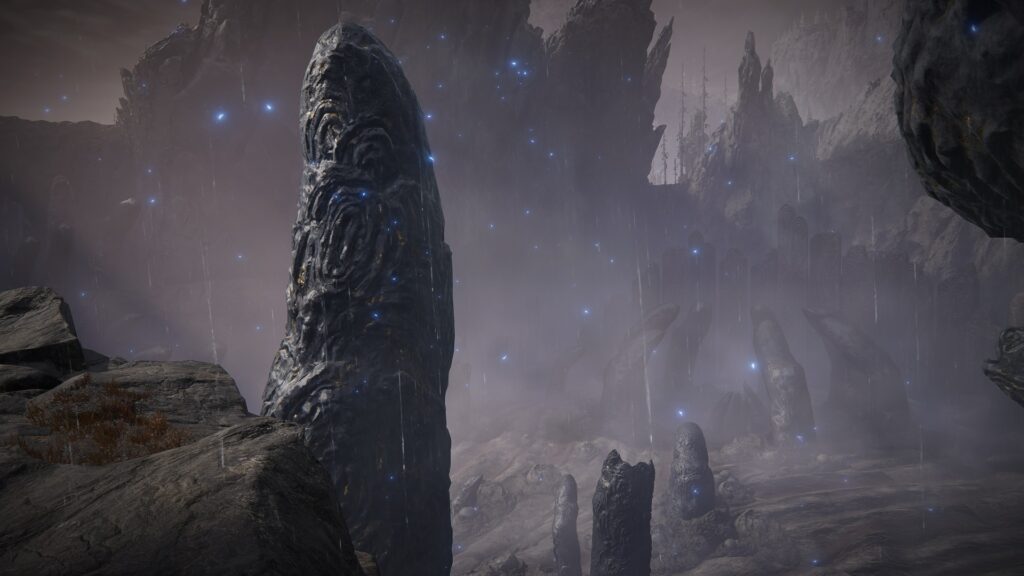
The path forward is through the defenses, but first we need to backtrack — there’s quite a bit on and around the frozen lake behind us that we missed. From the site of grace, head north-northeast back through the palisades, again making sure you give the huge dogs a wide berth. Once you’re through the palisades, turn right and head southeast uphill towards the stone worms that indicate an evergaol is nearby.
At the top of the small rise, you’ll find the Lord Contendor’s Evergaol — step on the center of the gaol and enter it to face Roundtable Knight Vyke.
Once Vyke is defeated, you can remount Torrent and then head due east from the evergaol, and drop off the cliff here, landing near the Spiritspring jump below. Just ahead to the southeast is a graveyard with four dogs in it — collect the golden runes and then continue east-southeast along the road to the church. Make sure you stay off the lake for now, and don’t miss the Arteria Leaf at the base of a tree on your right as you approach the church. Before you enter the church, also go to the front of it, where you’ll find a corpse with the Somberstone Miner’s Bell Bearing [3].
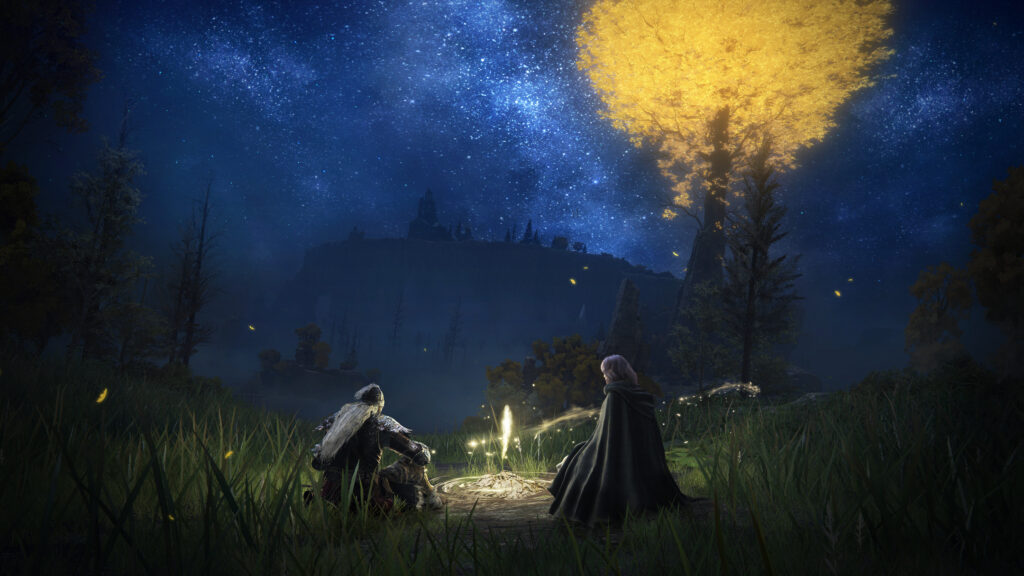
Inside the church, you can rest at the First Church of Marika site of grace, and you’ll find the usual Sacred Tear at the foot of the Marika statue. Note that you can also speak to Melina at the site of grace here. Head south behind the church (past the statue) and go east, then northeast up the rocks here — at the top you’ll find a corpse with x3 Smithing Stone [7]. Jump off heading northeast and continue that direction — at the next cliff edge, you’ll see two big ice lobsters guarding an Arteria Leaf below. Drop down and grab the leaf, then make a speedy getaway northwest out onto the lake (don’t forget to zig-zag to avoid being hit by the lobster’s projectiles).
Once you ride out onto the lake far enough, a blizzard will start. Summon Latenna (or your strongest ranged spirit ashes), as you’re about to meet a new dragon — and it isn’t friendly. Our guide’s coming soon, but for now just know that you can fight this dragon exactly like Lansseax (see guide).
After defeating Borealis, you’ll probably be in the middle of the lake, or thereabouts. From center of the lake, you can look southwest and see a lobster submerged in the ice. There’s a Somber Smithing Stone [8] next to it, but don’t get tempted by what appears to be easy prey — if you attack the lobster, it will pop out of the ice, and so will its friend.
From the corpse, head north, and once you pass another lobster, you can veer northwest and start hugging the rocks on your left. You’ll soon be able to turn left and follow the trail of jellyfish to a cave entrance guarded by a stonesword imp statue — for the low, low price of two Stonesword Keys, you can enter the Spiritcaller Cave.
From the entrance to the Spiritcaller Cave, head northeast, towards the two rock formations there. Make your way to the one on the left and up it (1) to find a Golden Rune [11]. From the corpse, look west at the small stand of trees — an invisible loot beetle is pathing in a circle around it (2). Get in its path and time your swing to claim the Ash of War: Seppuku.
1
From here, continue west, staying on the low ground. You should pass a summoning pool, and just beyond it on the right is the Freezing Lake site of grace (here it is on the map). From the site of grace, follow the path southwest down the hill, and you’ll reach the frozen river you first discovered at the beginning of the zone. To the south across the river is an illusory tree with a Golden Seed at its base — the giant here is slow and won’t chase you very far, so you can ignore it. After grabbing the seed, ride back to the river and turn right, then ride east past the sleeping giant (making sure it starts waking up). Beyond the giant, there’s a cracked statue that can be broken to reveal x3 Smithing Stone [7].
It can be a pain to get the giant to swing at the statue, as the giant’s leash range is basically at max range for hitting the statue. You’ll need to use projectiles or ranged attacks to keep aggro while standing near the statue — eventually, the giant should swing at you and break the statue in the process. Once you’ve gotten him to bust open the statue for you, grab the smithing stones from inside and ride away, back to the Freezing Lake site of grace. Rest there to reset aggro (which will let you open your map), and then teleport back to the Whiteridge Road site of grace.
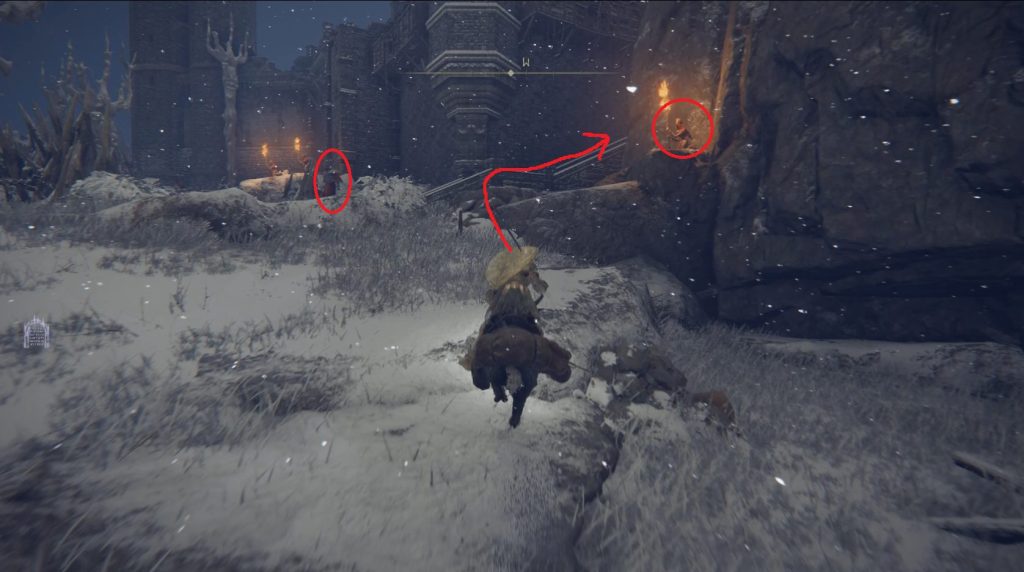
From the Whiteridge Road site of grace, head southwest through the wooden palisades — most of the enemies here are looking to the south, so you can avoid aggroing them easily. The only exceptions are the two foes near the stairs we want to take into the Guardian’s Garrison: there is a fire priest on the right of the stairs, plus a fire monk near the base of the stairs. The priest almost always spots you, but you can go right past the priest and avoid the monk aggroing as you go up the stairs and enter the garrison.
The monk is on the left, priest on the right
Once you go through the threshold of the garrison and are automatically dismounted, turn around and see if the priest is following you — unfortunately, this fellow has ranged attacks, so you may have to go back down the stairs and kill him. If you leave him here, sometimes he’ll make his way up the stairs and ambush you while you’re fighting other enemies, so you really don’t want to let him live. Be careful of the fire monk, who may also notice you at this point and is a much stronger foe.
Inside the garrison, summons are available, so feel free to call up your favorite mobile spirit ash. Then sneak straight (northwest) from the doorway through the open gated doorway and turn right on the wooden platform — there’s a dog here feasting on a guardian’s corpse. Kill the dog, then turn around and go to the southwestern end of the wooden platform — behind the wooden objects here is a Golden Rune [10]. Grab it and then head back into the garrison.
Look southwest, and you’ll see a guardian with her back turned. Resist the urge to rush at her, as there’s a dog lurking behind the fence. Instead, sneak towards her until the dog notices you, then sneak away from the guardian while the dog approaches. If you’re far enough away, you can kill the dog before the guardian has time to notice the action and reach you, preventing a 1v2. Once the foes are dead, first go up the stairs and clear the two rats out, then loot the corpse for x6 Smoldering Butterfly and jump down to the ladder.
Stairs first, ladder second
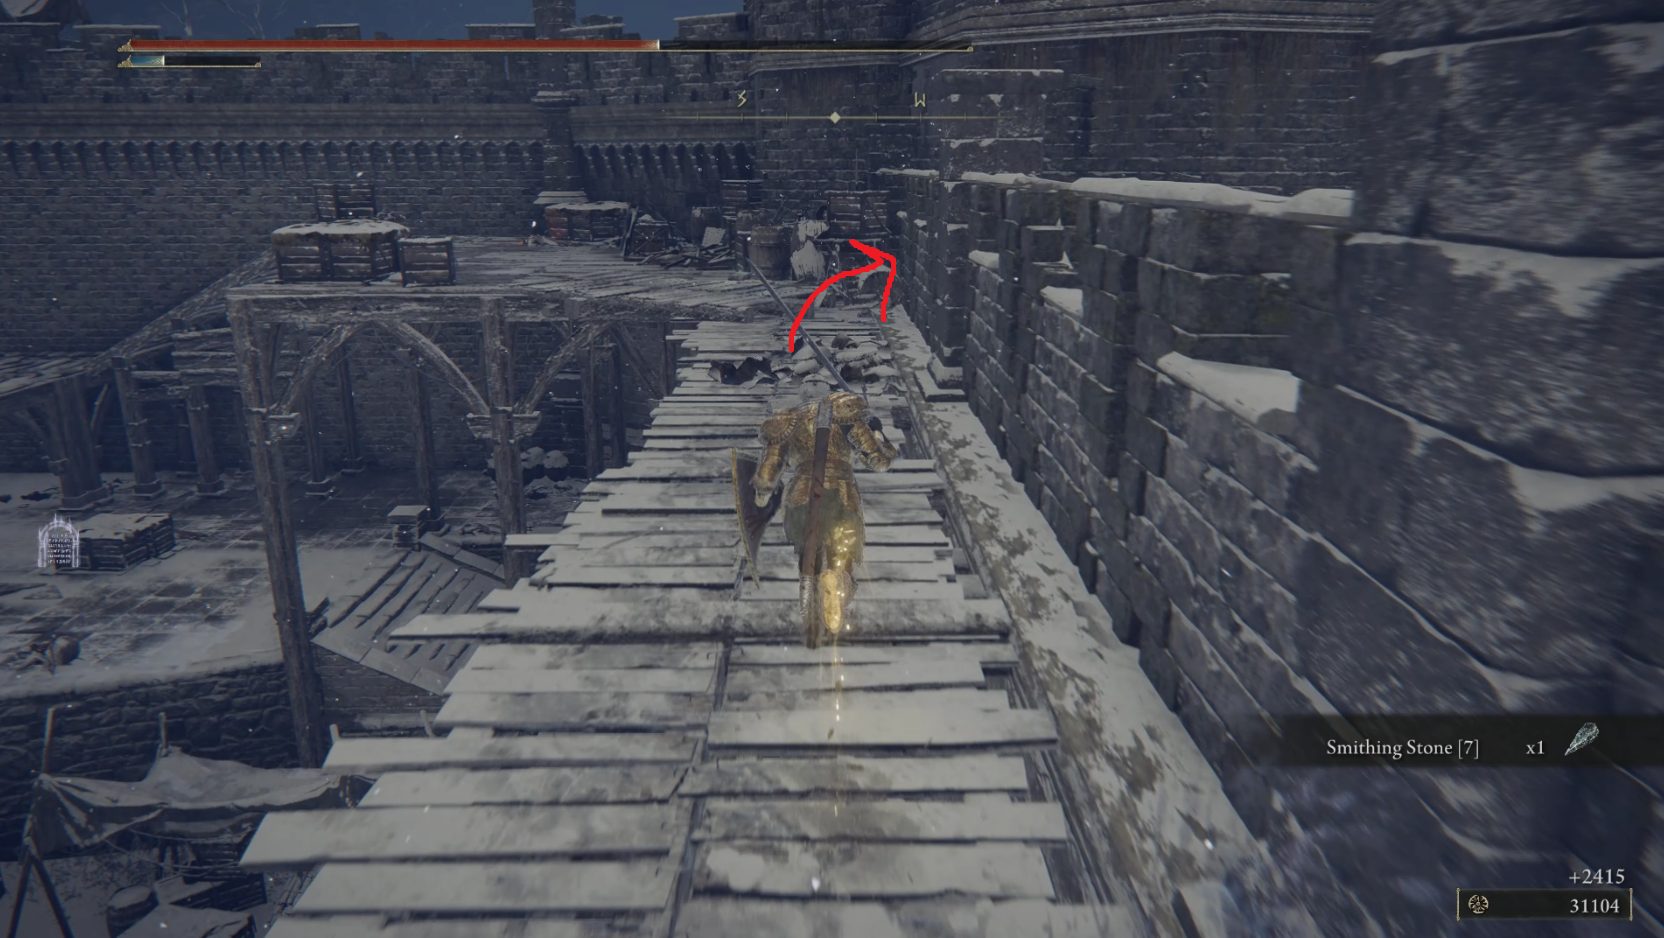
After climbing the ladder, continue forward and then up the stairs. Sneak once you get to the top, and you should be able to ambush the flame guardian to the north. This may alert the one further to the northeast, but if it doesn’t, you may be able to sneak up to that one as well. At the far northeastern end of the ramparts is a corpse with a Smithing Stone [7] — grab it and then turn around. Near the first guardian you killed on the ramparts (by the tower), turn right and look over the edge. You should see a wooden walkway — jump to it. You don’t need a running start, but you do need to make sure you aim carefully or you can definitely fall through the gap to your death.
Upon landing, go northwest and then make your way around the tower. You’ll go up some stairs, and at the top, turn left to head north into the tower room. There are two dogs here, a big one and a little one — target the little one on the left first (it dies faster) and then kill the big boy. At this point, the Chief Guardian Arghanthy is probably pretty close, so run out of the tower room and continue running south-southeast, past Arghanthy and into the tower (1). Inside, climb the ladder all the way to the top. Then, turn around, and drop down onto the small platform to the left of the ladder (2).
(1)(2)
From the platform, you can safely use both melee or ranged attacks on Arghanty once he climbs far enough up the ladder — he’ll get stuck climbing up and down right in front of you, and since the fall is lethal, your melee attacks will not cause you to fall. Once he’s dead, you’ll receive the One-Eyed Shield, and then you’ll need to jump northeast to the platform on the other side of the tower wall. From there, you can safely drop the rest of the way down, and then climb the ladder again. Then go outside onto the tower balcony and open the chest to find the Giant’s Prayerbook.
Climb back down the ladder and leave the tower, then immediately turn right and jump over the sandbags and down to the wooden platform below (1). Jump northeast onto the next platform, and then you’ll have to jump again to the one further to the northeast (the one with all the dead guardians on it). Here you’ll be able to grab x5 Smoldering Butterfly from a corpse, then turn around and go back to where there are two dead guardians. Here, jump slowly forward and you can make your way up onto the crenelation (2), and walk northeast on the crenelation until you can’t go forward anymore.
(1)(2)
At this point, you can jump up onto the higher portion of the wall, and from there it’s an easy hop onto the roof to the north-northeast. Continue onto the next section of rampart and follow it until it dead-ends at a dead guardian with x2 Gravel Stone. With that grabbed, we’re all done with the Guardian’s Garrison — go back a bit on the rampart and drop down into the courtyard, then leave via the front entrance.
Remount Torrent once you’re outside, and head straight (southeast) to the corpse that sits just behind a huge fire monk. Loot the Stonesword Key and then ride away to the southwest. Look up into the trees on the left of the path and you’ll see a loot beetle — knock it down with a ranged attack and finish it off to receive the Ash of War: Prelate’s Charge. Be careful grabbing this loot beetle, as you may be still pursued by the fire-worshippers you just ran by.
Get back on the path and continue southwest, then stay on it as it curves south. Cross the huge chain to reach the other side of the canyon. There, you’ll find the Map: Mountaintops of the Giants East, and the Giants’ Gravepost site of grace.
This walkthrough continues in the Southern Mountaintops tab!
The hands (large and small) in this next area will sometimes drop a Somber Smithing Stone [7], so if you need these to upgrade your weapon, it’s worth killing the hands instead of riding past them.
From the Giants’ Gravepost site of grace, ride west, following the path that is closest to the edge of the cliff (1). The path will narrow considerably, and then you’ll round a corner and be heading southwest — from here, you can see our next destination in the distance (2), the Giant Conquering Hero’s Grave.
(1)(2)
You’ll need to make your way southwest and then west down the hill. (If you’d like a bit of lore, you can first head south through a cleft in the rocks to find a sword graveyard with a monument inscribed with some text.) At the bottom of the hill, you’ll see a small gap you need to jump in order to reach the plateau the hero’s grave is on. As you approach the gap, a hand will crawl out from below the rocks — don’t panic, just go around it and jump the gap. It can’t chase you across, so you’ll be safe on the other side. You can kill it with ranged attacks if you want, or you can just continue west into the dungeon.
Once you’ve cleared the hero’s grave, teleport back to the Giants’ Gravepost site of grace, and then head southwest up the hill. If you want an Arteria Leaf, there is one to the right, just above the path you took to the hero’s grave. There are also x5 Fan Daggers and x2 Warming Stones on the path that leads uphill, although you’ll need to grab them from under the beak of a rather large bird. Our next destination is the Church of Repose — the path can be a bit confusing since it winds through a lot of frozen giant corpses, so just use the map if you’re lost.
As you approach the church, you’ll be automatically dismounted from Torrent, because you’re about to be invaded. Start sprinting towards the entrance to the church, and you’ll see Bloody Finger Okina spawn in as you enter the church. Ignore him and continue into the church, and tap the Church of Repose site of grace before turning to fight him (securing yourself a nearby respawn), then have at it. This NPC is terrible at dodging projectiles/ranged attacks, and is fairly easily staggered — if you were able to defeat Vyke, this guy will be no trouble at all. Upon defeat, Okina drops the Rivers of Blood, his mask, and 11,155. Don’t forget to grab the Sacred Tear from the base of the Marika statue, and then rest at the site of grace (and upgrade your flask).
From the Church of Repose site of grace, you can go southeast, up into the giant skull’s mouth, to find an Ancient Dragon Smithing Stone.
Then go back to the church — head due south from the back of the church to find a few hands and a few Arteria Leaves. Further south around the corner and to the southeast is a Spiritspring Jump — jump northeast from the Spiritspring to reach the top of the giant skull, where you’ll find the Ash of War: Troll’s Roar on a corpse. Once you’ve picked it up, you can teleport back to the church’s site of grace. Head southeast to the rocks and then turn east, hugging the rocks on your right to find even more Arteria Leaf. Next, head due east from the church, and you’ll soon reach the Foot of the Forge site of grace.
Activate it, then go northwest to where a bird is feasting on a corpse. Get about 2 meters away and then back off a bit — a giant hand will drop down from above and crush the bird. While the hand recovers from its fall, dash in and pick up the Smithing Stone [7], then ride away quickly to the northwest — on the rocks ahead are a few Arteria Leaf. Grab them before the hand catches you, then turn around and go northeast, hugging the rocks on your left. You’ll turn into a little alcove in the rocks and find a corpse with a Golden Rune [10] — avoid the little hand here, grab the runes, then ride far enough away to de-aggro both hands.
Then return to the Foot of the Forge site of grace (don’t teleport) and look west, where you’ll see a path you can take with Torrent up to one of the frozen giants. At the highest point of this rock formation is a large loot beetle that will teleport away when you get too close (although players with powerful ranged attacks can kill it before it does so). When it teleports, head south to find it on the low ground. It will teleport again, back to its original location. Make your way back up to the top of the rocks, and it will teleport one more time — look west on the low ground and you should see it. It won’t move again, so this time you can actually kill it to claim your Somber Smithing Stone [8].
The path to the beetle’s initial locationThe first (and third) location of the beetleLocation #2Final location
Head back to the Foot of the Forge site of grace, and from there ride due northeast, heading uphill. You’ll eventually come under fire from giants throwing large magic pots, so make sure you start dashing once you’re partway up the hill. Continue northeast and you’ll hit an illusory tree — grab the Golden Seed from its base and then go even further northeast. At the edge of the plateau you’ll find Starlight Shards at the base of a stone quarter-sphere. From here, turn left and head southwest, passing the giants that stand on the edge of the rocks.
Note: there are a number of Arteria Leaves scattered around this area, on top of a few rock formations that require some jumping to scale (see on map).
Hang a right past the giant throwing magic pots, and continue northwest to the corpse with the Golden Rune [10]. Continue following the path as it turns further right to head east downhill. You’ll see another corpse with another Golden Rune [10], but watch out for the giant hand that will crawl out of the ground nearby. Dash past it and stay on the path, which will now curve left to head north further downhill. Keep following the path as it narrows and winds west. The path will eventually narrow significantly, and you’ll reach a spot where the entire path is covered in hands.
Use torrent to double jump over the hands a few times and continue west — the path will end at a stone basin with Crimsonwhorl Bubbletear. Grab it and then quickly use the tombstones that stick out of the cliff to the northwest to drop down to the Giants’ Gravepost site of grace, where you can rest to lose aggro. If you don’t move quickly after picking up the bubbletear, a large hand will show up, so you want to move with some urgency.
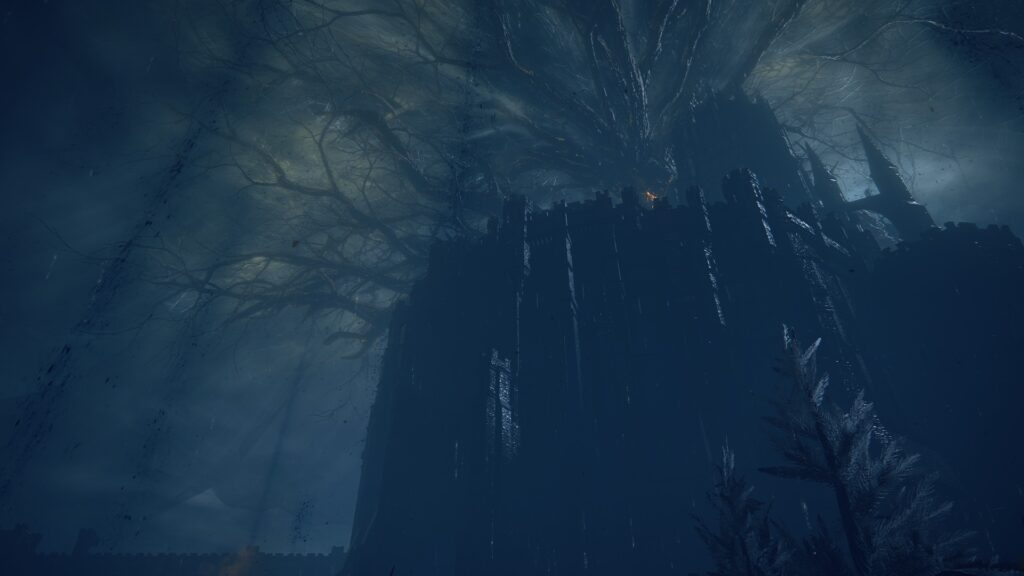
Now teleport back to the Foot of the Forge site of grace, and once again head northeast uphill. This time, look to your right as you make your way up the hill, and you’ll soon see a lit torch. Head towards it and then cross the nearby chain (make sure you look into the crevasse as you cross it to see some big ‘ole bones). Go through the doorway on the other side of the chain and head further southeast to begin the Fire Giant boss fight.
After defeating the Fire Giant, make your way east-southeast up the hill to the Fire Giant site of grace. Tap it and head northeast towards the forge. Make your way onto the massive chain and follow it northeast onto the rim of the forge. Turn left once you’re on the forge (careful not to fall into the forge) and follow the rim north, then east, to find the Forge of the Giants site of grace just before the large hole in the side of the forge.
Resting at this site of grace will allow you to speak with Melina, who’ll ask if you’re ready to burn the Erdtree. If you say “I’m ready”, you’ll need to reach a site of grace in Crumbling Farum Azula before you can teleport, so if you wanted to do another section of the game before continuing on the main path, it’s better to tell Melina “I’d like you to wait” — you can teleport back to this site of grace and speak with her whenever you’re ready to continue on the game’s main path. If you wanted to do the Lord of the Frenzied Flame ending, you’ll also need to finish the related quest before returning to this location.
When you’re ready, speak with Melina and tell her you’re ready, then enjoy the cinematic. Once it finishes, you’ll be teleported to Crumbling Farum Azula!
That concludes our walkthrough of the Mountaintops of the Giants! Check out the “Where to Go After the Mountaintops of the Giants” section below for suggestions on where to head next.
Where to Go After the Mountaintops of the Giants
While the next step on the main path is Crumbling Farum Azula, there are a number of optional areas you can and should do first if you’re interested. If you’ve acquired both halves of the Haligree Medallion — (left) and (right) — you can use the Grand Lift of Rold to get to the Consecrated Snowfield, by way of the Hidden Path to the Haligtree;this is the area that lets you access both Miquella’s Haligtreeand Moghwyn Palace.
Share this article:
DanielD
Unabashed FromSoftware fanboy still learning to take his time with games (and everything else, really). The time he doesn't spend on games is spent on music, books, or occasionally going outside.
I have been following this guide since limgrave and very much appreciate to you all who patiently write all of these in details!! Such a noob person like me who never play any soul games before, love these walkthrough! Cheer! ðŸ˜ï»¿
It’s awesome that so many newcomers to the series are enjoying Elden Ring — glad we could help you on your journey!
Phil
2 years ago
Your walkthrough directions from place-to-place, plus your descriptions and procedural suggestions are the the best, bar none. Thanks. So helpful.
Strongf1sh
3 years ago
Thank you very much. I definitely missed a bunch of stuff. You may want to include the hermit merchant on the same plateau as the stargazer ruins. He is hard to get to but he’s definitely there.


I have been following this guide since limgrave and very much appreciate to you all who patiently write all of these in details!! Such a noob person like me who never play any soul games before, love these walkthrough! Cheer! ðŸ˜ï»¿
It’s awesome that so many newcomers to the series are enjoying Elden Ring — glad we could help you on your journey!
Your walkthrough directions from place-to-place, plus your descriptions and procedural suggestions are the the best, bar none. Thanks. So helpful.
Thank you very much. I definitely missed a bunch of stuff. You may want to include the hermit merchant on the same plateau as the stargazer ruins. He is hard to get to but he’s definitely there.
We’ve got him in there, thanks for the tip though Strongf1sh!
You forgot Prelate Charge Loot Beetle above in a tree just after the big monk guy (after the imp key)
Thank you Argo, nice catch!